“Trying out a…” is a series of articles from the pages of Tailboard magazine. Written by ‘Retro User’, each one spotlights a particular camera, from a user point of view. The cameras featured are all tried and tested out with a fresh roll of film or, in the case of digital cameras, a new SD card. The cameras under scrutiny may not be what many collectors class as ‘classic’ – but they are all worthy of being ‘tried out’.
Trying out a… Cosmic 35
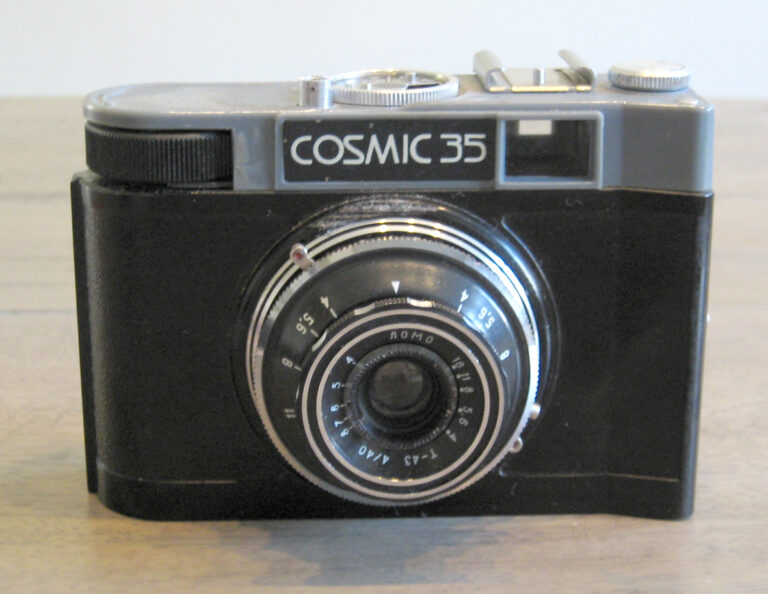
We now boldly go where roughly 100,000 people have gone before – the late 60s plastic bodied masterpiece that is the Cosmic 35.
The Cosmic 35 was a smash hit in the days of the USSR, descending from a family of amateur snapshot cameras called ‘Smena’ (“Generation”) that started in 1952 and continued into the 1990s, with a great many models, and minor variations across each of those models. Made by the GOMZ-LOMO factory in Leningrad, the most popular one was the Smena 8 – renamed the Cosmic 35 for the export model – the version which I have.
The early Smena cameras are typical early 50s style, but the designed changed in 1961 with the launch of the Smena 5, and it’s that line of models that really hits the quirky collectors spot. I’m trying to think of another camera that has a hand grip on the left edge – instead of the right. The only one that springs (no pun intended) to mind is the 1956 clockwork ‘Leningrad’ camera – both that camera and the Smena 5 were designed by I Shapiro, so maybe that was his signature motif!
As mentioned the body is a two piece plastic affair, and although the top plate looks like it’s trying to get away from the body, it is a good fit – and certainly my example has no light leaks whatsoever. The entire back comes off for film loading, and it has a surprisingly well made, and firm metal sliding latch.
As is often the case with many simple/amateur shooters of the period there is a removable slot in spool, this means you can pop a 35mm cassette in the left hand chamber and load onto the spool, or if using reloadable cassettes you can do a spool to spool route to shoot short film lengths (by using the take up spool the wrong way round).
Amateur status is obvious from the choice of lens – a 40mm f4, so a wider than normal view, but better depth of field so guestimate focus is more likely to be good enough. Talking of view, the viewfinder is miles off – you get easily 10-15% more on film than you see – but I suppose better to get more on film than cropping heads off!
Needless to say there is no rangefinder here, but you do a get a handy film reminder/exposure counter combo, and 5 speeds plus B is more than enough for the snapshotter target audience.
One final quirk is the film rewind – having no instruction booklet, I eventually decided that the shutter release must somehow be involved in disengaging the wind on, and indeed a closer inspection reveals a red dot – you press the button all the way down, then turn it clockwise to lock it in position. The very nice film rewind can then be used, without destroying the film sprockets!
As a popular choice for the hip/ironic/with-it/lost it generation, I’d anticipated vignette city, coupled with bluro-vision – but not at all. The lens is a really good performer, with good saturation in bright sunlight, and very nice subtle tonal gradation in overcast conditions. The slightly out of date Kodak 200 is a very good match for the Cosmic 35.
The funny thing about this camera is that I bought it as a broken camera at Photographica 23 (from the £2 ‘as found’ tub) intending to get the lens off and bodged onto a mounting plate for some fun on a digital body. It wasn’t broken at all, the timer mech was simply gummed up, preventing anything else from operating. The tiniest squirt of WD40 and it was as good as new. So it just shows that sometimes the cheapest purchase can be the most rewarding and fun – the huge number produced means that they are plentiful , and usually working. Expect to pay £10 for a scruffy worker, maybe a few pounds more if it’s boxed.
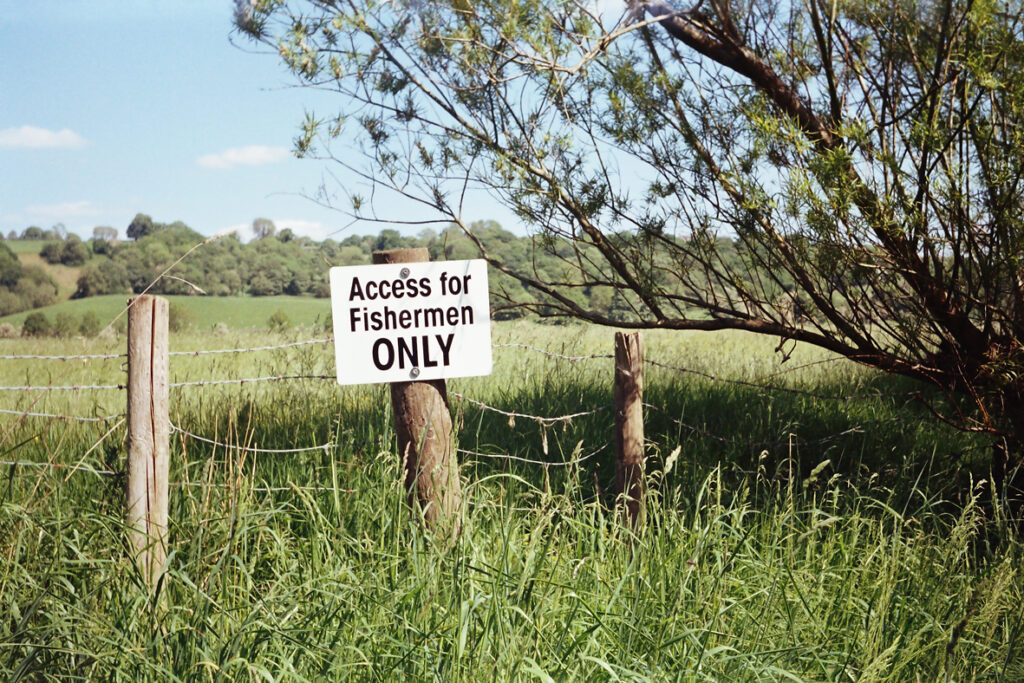
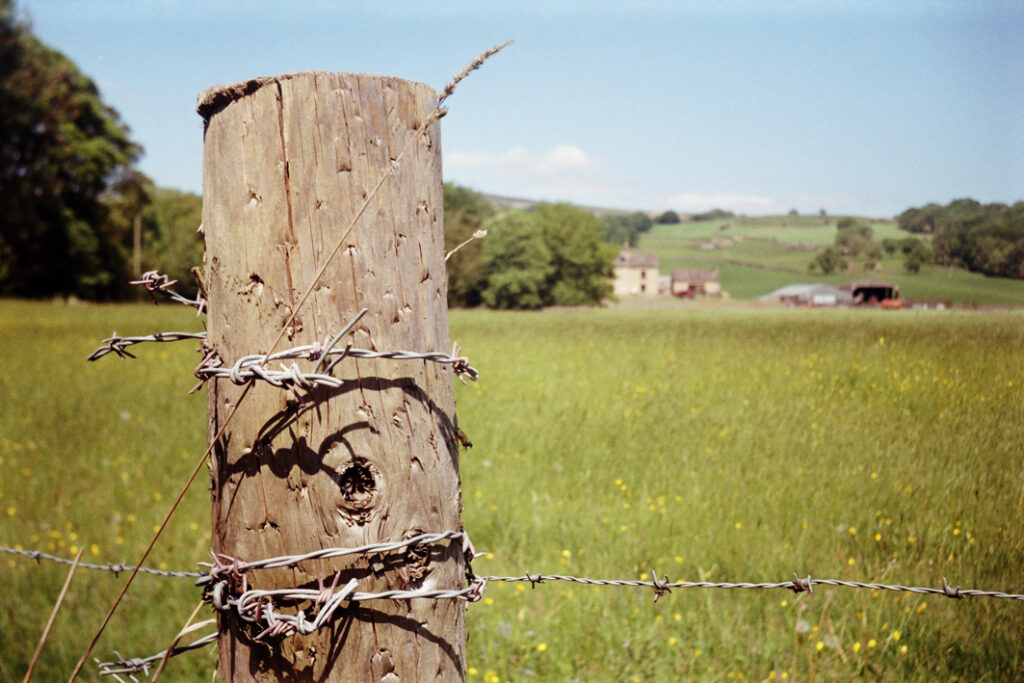
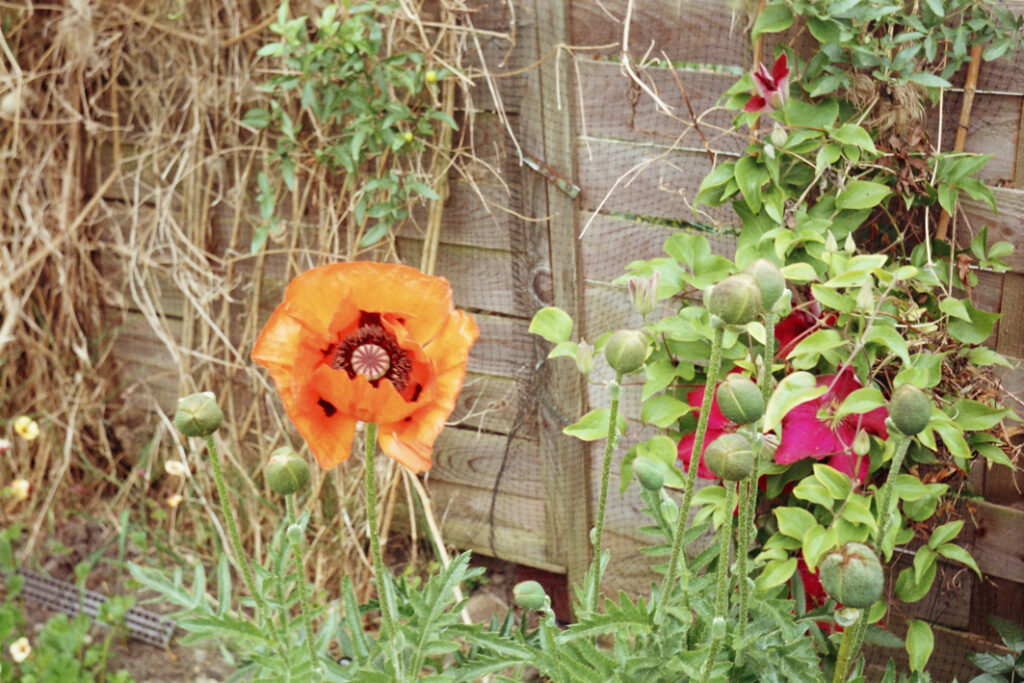
Trying out a … Kiev 4a (type 2)
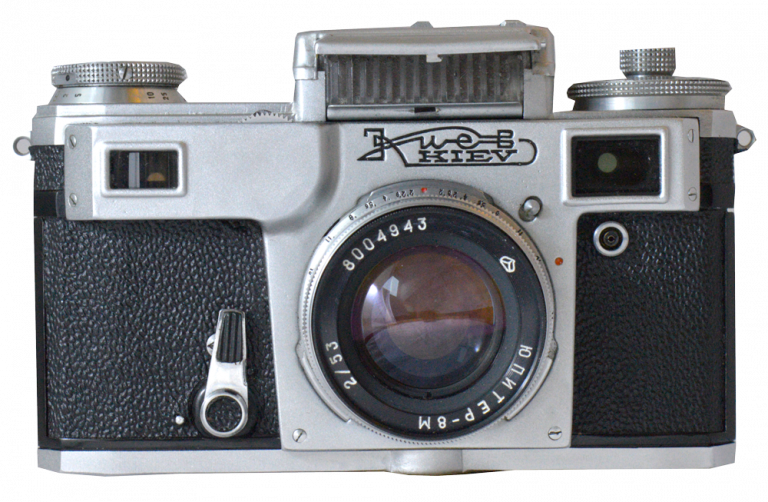
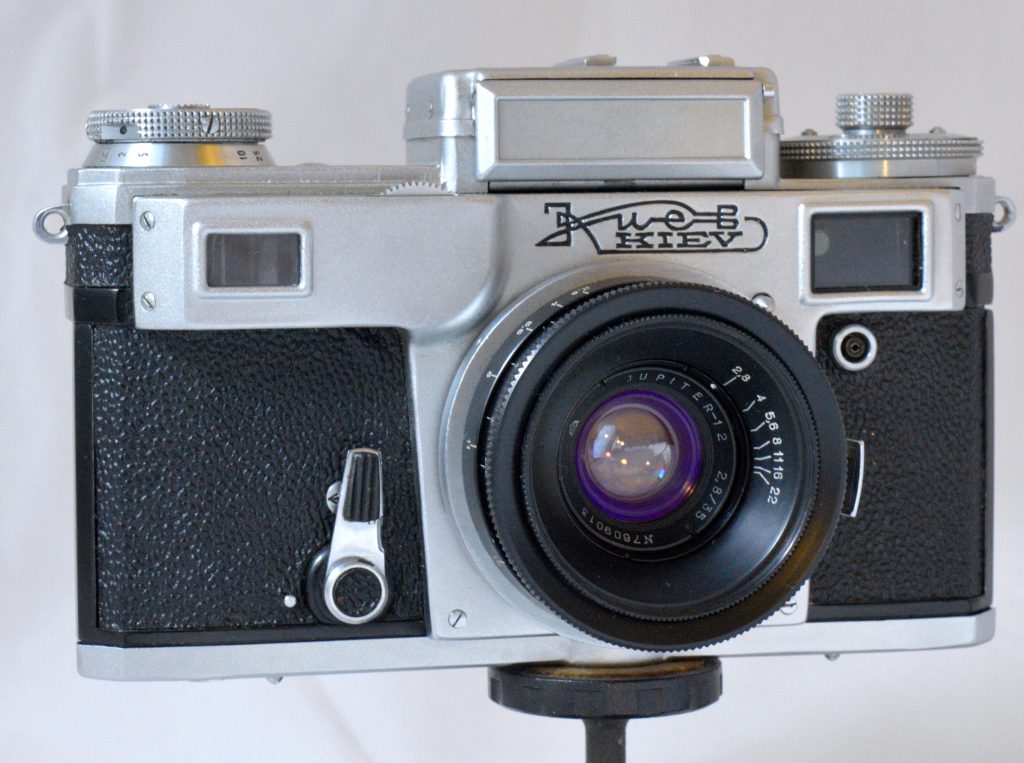
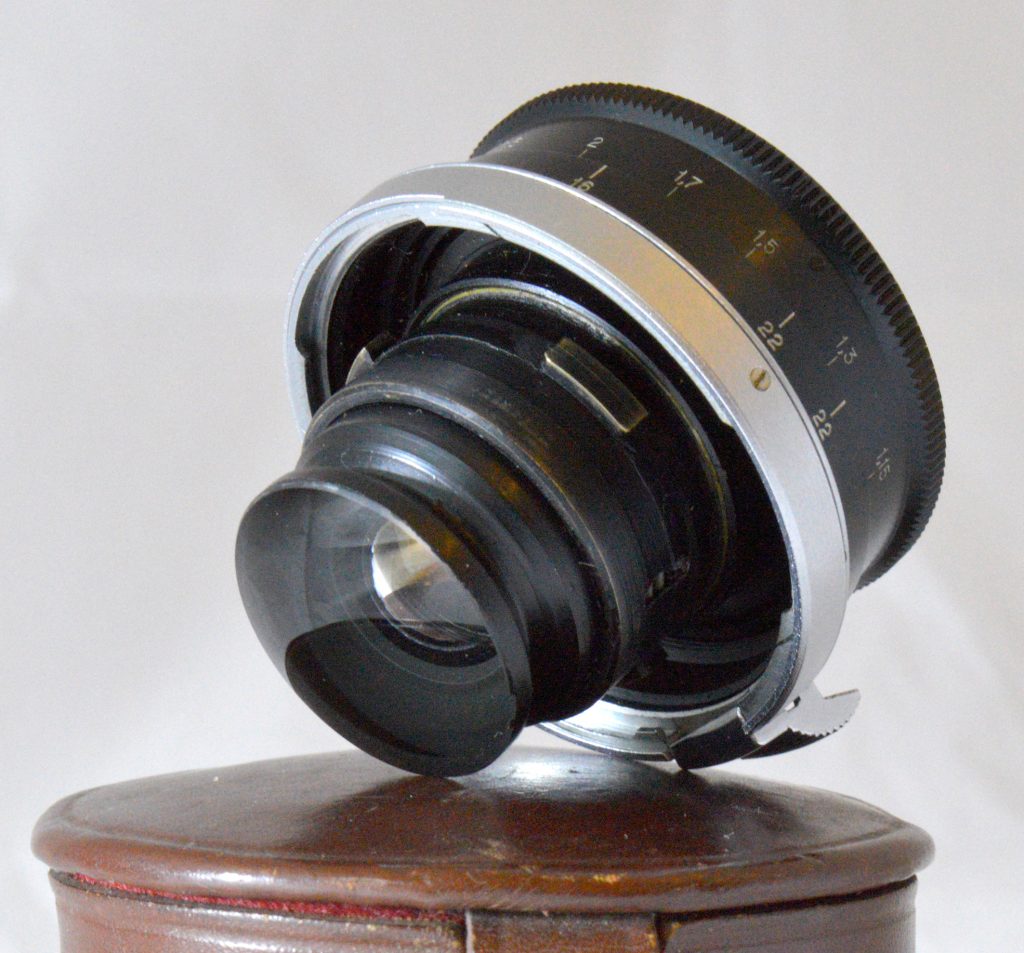
A classic symptom of being a collector (or possibly of being slightly soft in the head) is buying either cameras without lenses or lenses without the camera body. 18 months ago I spotted the wonderfully whacky Jupiter 35mm f2.8 lens in the 2nd hand window at my local camera shop. I had seen them before (that giant rear lens element is quite unforgettable) but not at such a knock down price. It’s quite a relief to see that I’m not the only person putting ‘legacy’ lenses onto digital bodies – the ‘Digital Dodger’ is also guilty of it! I bought the lens and happily hopped onto ebay to buy the required Kiev>Sony Nex lens adaptor – and hit a snag – there’s no such thing… Not put off I decided that I’d find a scrapper Kiev body and prize off the lens mount to make my own combo (as the Kiev is a part for part copy I could also have searched for a Contax body for the same purpose, but that would be sacrilege).
I was slightly surprised to find that although plentiful, the Kiev body has a relatively high resale value, so the project was virtually forgotten until Photographica 2019. I’d only gone part way round when I visited a stall with a lot of Russian items for sale – there was even a special sign that said “all items at sale price”… I had a choice of 3 bodies to go at – all included the standard lens. I picked out the nicest looking and haggled from £10 down to £5 as the shutter was broken – according to the dealer.
Sometimes you can get lucky – the single shutter speed that the camera seemed to be stuck on was due to the dealer mixing up the exposure guide (that’s around the rewind spindle) with the speed setting control, which is around the wind on knob. So for £5 I had bought a very nice, fully working Kiev 4a (2) with std lens, in its RE case, for a fiver – sweet!
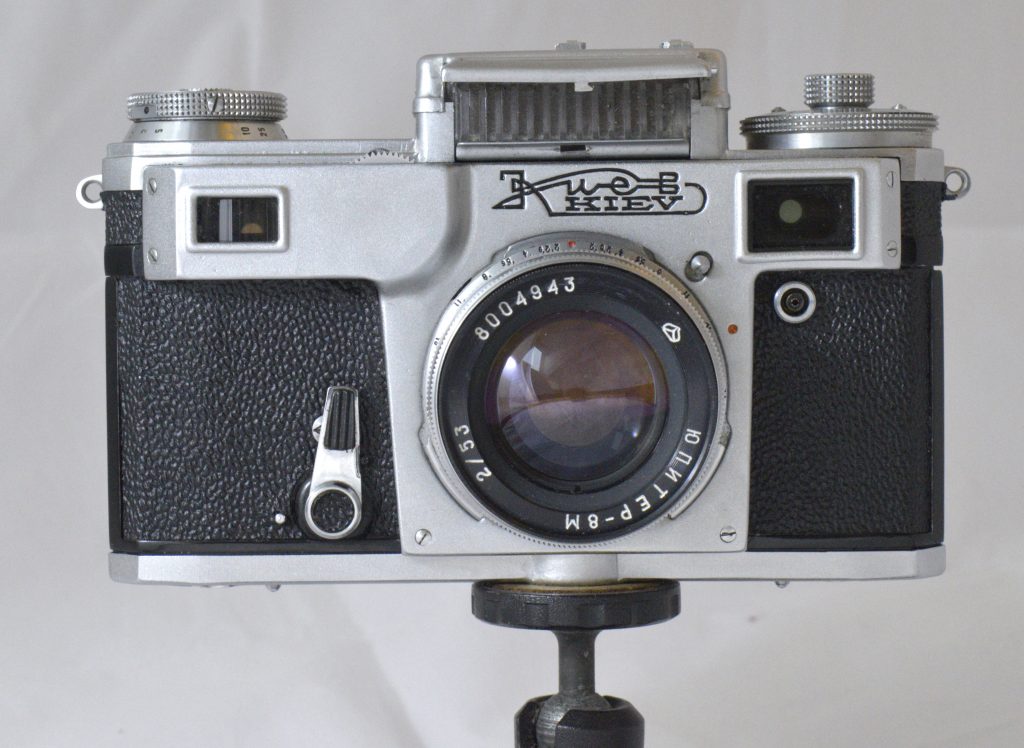
The ARSENAL factory in Kiev made their original Kiev camera (a ‘copy’ of the Contax II, although the first ones used genuine Zeiss parts) from 1947, with model variants along the way until the Kiev 4m (1976-1987). My model is the 4a (type 2) and was made from 1974 – 1980, and is a fairly close copy of the Contax III. The serial number 7925261 shows it to be from 1979 (so at least 25,261 were made in that year alone!).
Now, there was no way I was going to butcher a fully working camera – even one that was made in staggeringly high numbers. The thing is that the Kiev/Contax is a rangefinder with no mirror box, so the rear element almost sits on the film. Although the Sony Nex is mirrorless, I wasn’t keen on risking damage to the lens, the digital sensor or the shutter. So, instead I’ve had a go with the camera and lens as originally intended by the maker and bunged a film through it.
Incredibly the light meter still works and is accurate, no doubt the shield has helped, and a lifetime in the ER case ditto.
The camera does take some getting used to – thankfully you can set the speed before or after winding and the rangefinder works very well indeed, but the meter is not coupled, you manually set shutter and manually wind on. The quirkiest bit is that a special finger style needs to be used – a ‘normal’ grip will guarantee the user putting a finger across the rangefinder window. On first trying the camera I thought the patch was damaged as I could only see a part of it – in fact you use your first finger on the shutter release, your second on the fab focus wheel that sits on the top/front edge and keep the others out of the way. It’s an odd hold, but it works.
Russian cameras are known for their ‘industrial’ build – the Kiev feels substantial, but the wind on and shutter sound (in particular) are very reassuring – if not totally discreet.
So, what’s that lens like, you all ask?
As the lens is in such good condition it could mean it was either used once, the results being so bad it was left in its case, or it was so nice that the owner kept very good care of it – it turns out to be the latter. I’d read stories online of severe vignetting, terrible definition, blurs and all sorts of horrors, so felt some trepidation.
However even at f2.8 there’s no darkening at the corners, and the definition is more than acceptable. The shot of the tombstone engraving I think shows how capable it is – it was taken at f5.6 and is very even across the frame to the corners. The 35mm lens is deeply recessed and the stepless apertures are slightly fiddly as you reach into the inner surround to set them. I deliberately took shots with the sun in the frame which did incur flare and a drop in definition but no worse than a modern lens.
While not a ‘pancake’ lens the 35mm is quite shallow in profile (well, half of it sits within the camera body!) and I think that using it with the meterless Kiev body instead would make a very nice pocketable pairing – to my eyes the meter box is a bit of an eyesore!
The joy of cameras like this are that you want to use them as you don’t feel precious about them, and that means you’re more likely to actually take it with you on trips, regardless of the weather, with no anxiety about them getting damaged or stolen. As I’ve mentioned many times in these articles it’s a pleasure to shoot film, and work in a fully manual way – a sort of true and honest approach to photography – the Kiev is highly recommended – and best of all you can leave your Contax body in it’s cotton wool and put its lenses on the Kiev without worrying about a huge repair bill if the shutter seizes (which is more likely on the ‘superior’ Contax than the Kiev!)

Trying out a … Vivitar DVR 510N
SPOILER ALERT! This article features a digital camera!
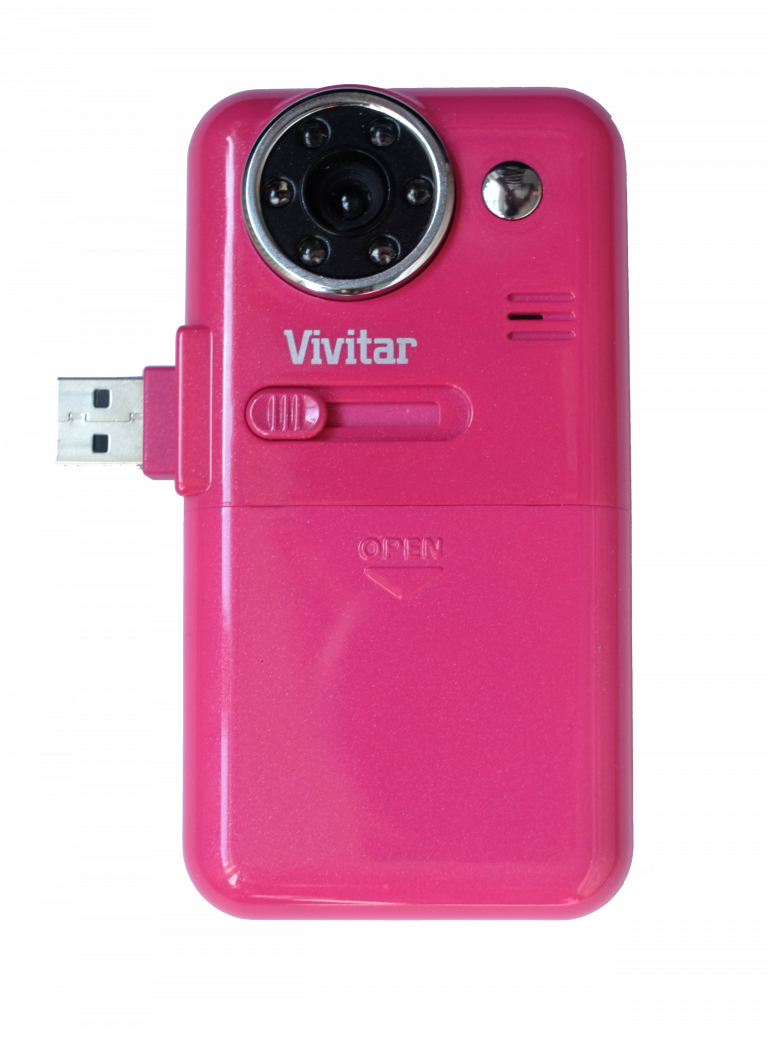
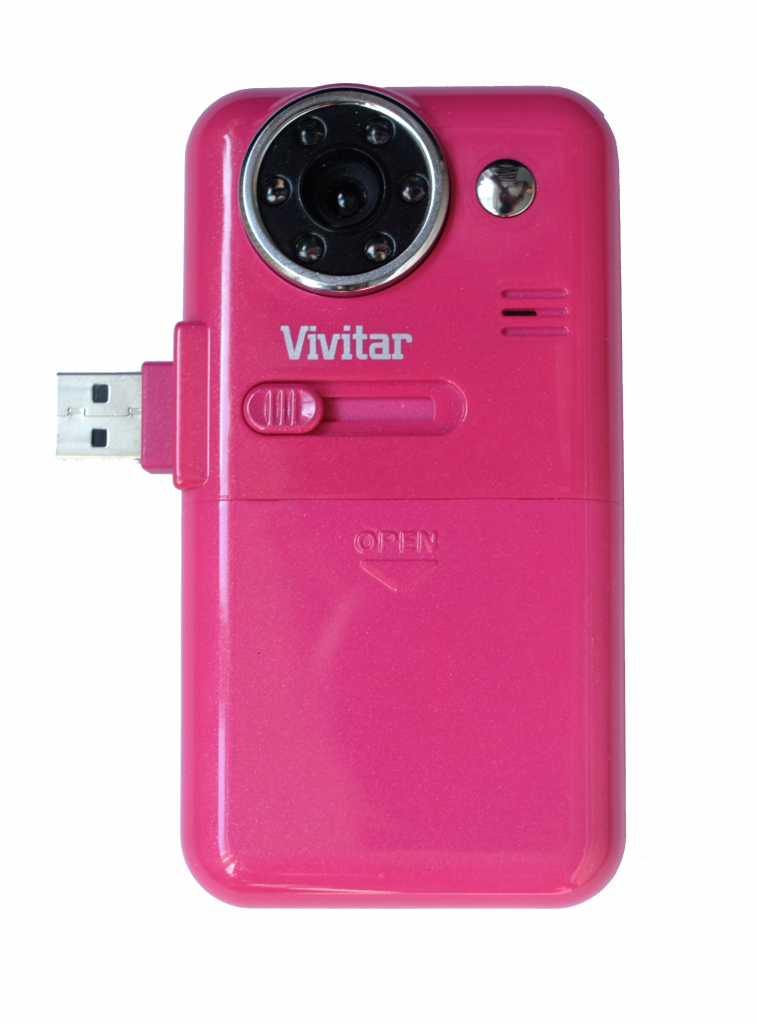
It’s funny how as a collector you can search for desirable or rare items, and once you finally track them down you may well be disappointed, and wonder why you wasted all that time and (possibly) money in the endeavour. The camera under the spotlight this time is one of which I had no prior knowledge, and only came into the household after my daughter spotted it on the dealers 2nd hand shelf – she was attracted to it as it is bright pink! As it came with its underwater housing, cables, CD photo software disc, ‘fully working’ guarantee from the shop and was £9 all in, I decided that it could indeed be a great purchase for a 5 year girl… possibly she was not the target audience that Vivitar had in mind when they produced this unusual camera back in 2004 (or so).
The beauty of the internet and certain shopping sites in particular is that the stuff that was sold for the last 20 years is still listed (as unavailable) along with the reviews at the time.
Looking at the barbie pink finish it’s a bit of a surprise to read that this thing was purchased as a serious bit of kit back then.
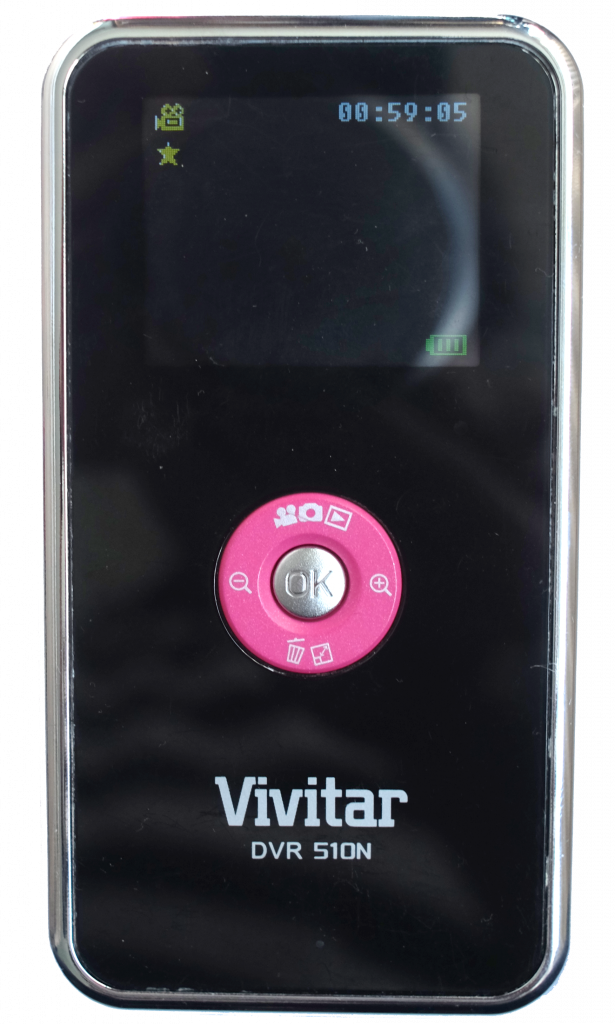
The specs are: 4.8mm, f2.8 lens (of abysmal quality), 8x digital zoom function (truly appalling), 1.3MB file size (an almost worthless 640 x 480 pixels size), 1.8” screen, built in 2GB memory (as if anyone would ever shoot 2500 images on this camera) plus a slot for up to 8GB SD card. It’s impossible to say what the shutter speed range is (there’s no mention in the instruction manual) but it behaves as if it is a single speed.
The design is actually very nice and functional, it is used held vertically with the screen at the back used as a viewfinder – which in anything other than very overcast days is almost impossible to see! But here’s the amazing thing about this camera – and explains the mix of glowing and scathing reviews on the webstore pages. That cluster of LEDs around the lens might suggest that they are used for flash. No! The very clever DVR 510N is actually a Night Vision camera! I didn’t even know that when I bought the thing, and it was only in the evening after fiddling about with it that I thought I’d see what the flash shots were like – and was convinced that it was broken.
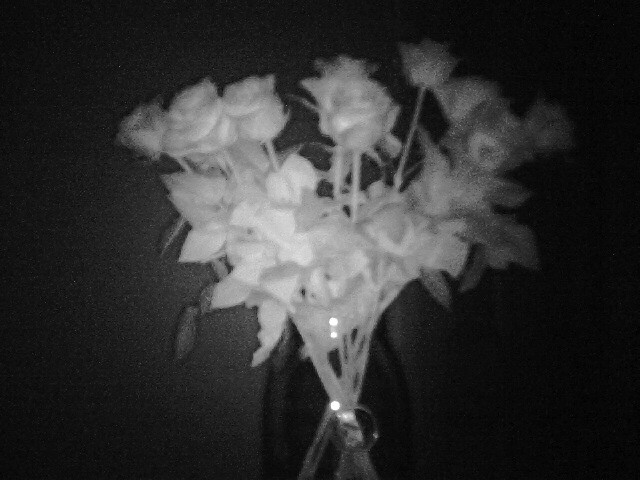
I then got a shock to see on playback a very spooky black and white shot of my daughter! The LEDS don’t flash, they give off infra red light so is invisible to living human beings. And spooky is the right word as Vivitar very cleverly jumped onto the hot TV show of the time with this camera. ‘Most Haunted’ was the must see show for all ghost hunters and paranormal nutters everywhere, and the chance to have a night vision camera for under £50 must have been very tempting… The 5 stars to no stars reviews seem to be split between the night vision fans (full marks), to someone dipping their toe into digital waters (no marks!).
Even for 2004 1MB file size is very paltry, and it’s such a shame as this camera did have the potential to be something special. You’ve no doubt worked out that DVR stands for Digital Video Recorder and that is reflected in its operation. On powering up it defaults to movie mode, and I’m sure many users would have been thrown on trying to take a snap, and the camera instead filming a shaky blurred clip of the end their nose as they tried to work out what had gone wrong. The controls are clustered around the rear central shutter release button, and for both movie and stills you can select 1 star or 2 stars – curiously the default is the lower quality setting – and by low, I really do mean low.
The infra red (night vision) function works without any prompting – there is a red icon on the rear screen that comes on when it’s in operation. In movie mode this is great as it is truly weird being in a pitch black room, yet on the screen you can see (just about) the (greyscale) scene in front of you as if lit by a rubbish low powered torch… Sadly the night vision mode for stills misses a trick. In that same pitch black room you can take your photo, but the screen is also black, so any chance of framing the ghost of Anne Boleyn before you shoot is impossible – one wonders how many spirit photos ’got away’ due to this design oversight?
The camera can be used naked or with it’s underwater clothes on – this is a very well made unit, and the only thing you can’t do in that state is to connect it to the computer. When you’ve taken your shots and movie clips the camera (minus the housing) connects to the PC with a nice integral sliding USB connector, and can also hook up to a TV by standard video cables and jacks (supplied).
As mentioned the 1MB file size is a non starter for even kiddie use, let alone serious photography. Coupled with a (probably) fixed focus of about 1 meter the camera is hamstrung from the off, and sadly the definition is easily the worst I’ve ever come across in a digital camera. I say probably fixed focus as the camera gives such unsharp images that I can’t truly say what the focus point is – if indeed there is one! Possibly the lens is offset for infra red focussing and daylight use has been left to its own devices… One final insult is that it is powered by 4 xAAA batteries – it keeps the design slim, but crumbs it’s an expensive way of powering the thing, and 15 years ago rechargeable batteries in that size were not that easy to come by. AAA always have a bad habit of giving up the ghost (pun intended) just at the vital moment.
So having slagged off the poor DVR 510N, why on earth have I reviewed it? Well, for one thing it is unusual in having true night vision. Secondly it was made in at least four colourways (black, pink, red and blue). The Coronet Midget is a true giant of the collector world, with many who are desperate to get the full colour set. The fact that the Midget barely functions as a camera is of little importance when you are trying to track down the marbled rose pink model. So I put the Vivitar in that class – a camera that was sold as a working camera (even though it was rubbish), that was available in different colours, was sold with promises of great things to the owner (‘now everyone can afford to carry a superb pocketable camera, ready to take shots at any time of day – or night’) and that in the decades to come it might just be one of THE ‘get the set’ collectables.
In case you do fancy getting one (or more) of these as a future collectable, be warned – there is a Vivitar 510 (without the N suffix) that is a totally different camera (different specs for one thing) and is held like a gun with the screen flipping out to the side.

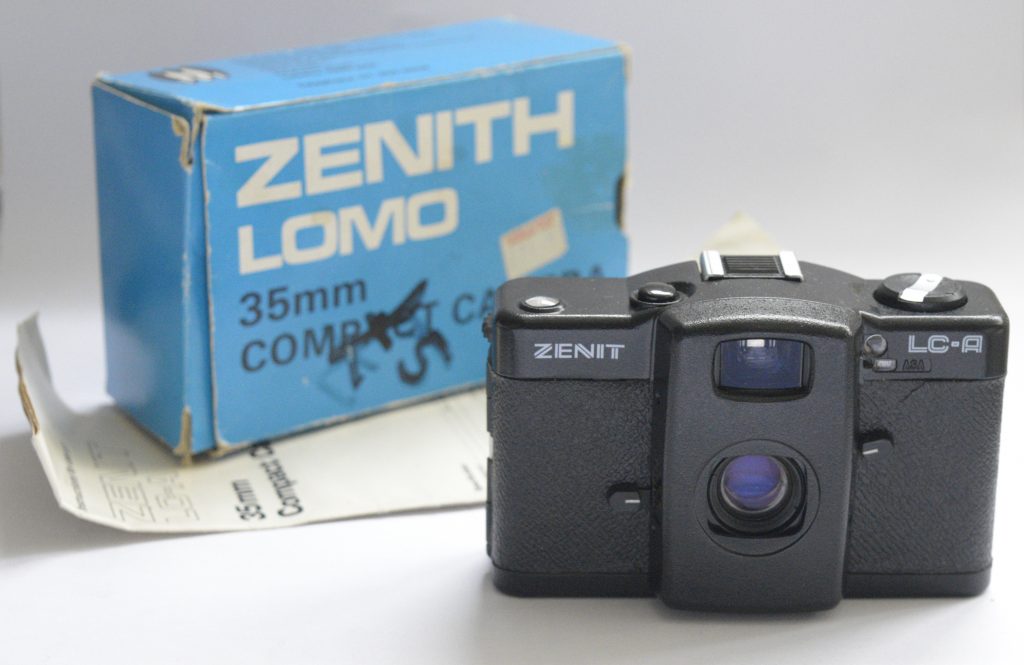
Trying out a … LOMO LC-A
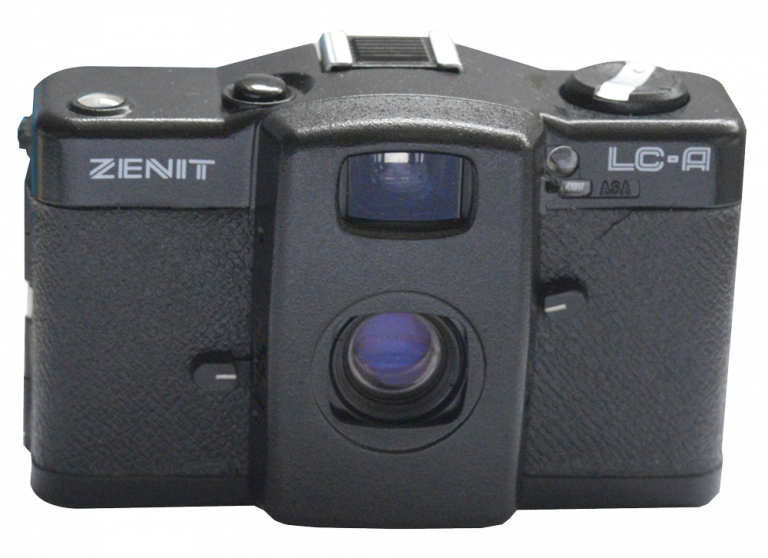
Once upon a time (in the early 80’s) it was possible to buy brand new, notoriously variable Russian cameras and equipment from many camera dealers. Zenits were a long running joke among camera snobs, who associated the noise and agricultural implement build quality with sub par performance (not always the case). FEDs had always been on dealer shelves, first the original Leica ’inspired’ bodies, later models taking their own uniquely Soviet approach to what should go where in the overall layout of controls. Nestled in among these ‘serious’ cameras was a humble, but vitally important viewfinder camera – the Lomo LC-A. One can argue that if this camera hadn’t been made, then 35mm film would have ceased to be available from the early 2000’s.
You can start to gauge the size of the former USSR when you read some of the production figures in the fabulous ‘Authentic Guide to Soviet & Russian Cameras’ book by Jean Loup Princelle. The LC-A was made from 1983 – 1993, selling well over a million units. For a camera that was barely marketed, that figure is amazing. However the truly amazing bit is the post 1993 life of the camera.
Before going to that a few words on the camera design origins and it’s peculiarities.
The Russians are well known for copying many western designs, (the Leica, the Bronica, Minolta 16 subminiature), but why on Earth they chose to visibly (but not physically) copy a poor selling Japanese viewfinder camera is anyone’s guess… The COSINA CX-2 is the inspiration, but although the LC-A has the hump front lens surround, Lomo ditched the complicated swivelling cover, and used a simple slider instead to reveal the lens. What makes the LC-A really different is the way the auto exposure works. The CX-2 was an aperture priority auto, the LC-A has aperture settings but set a fixed shutter speed, so these are only for flash use. The “A” setting is an oddball program mode, using a capacitor to determine when the exposure is correct – the instruction manual states 2 seconds to 1/500th, and you can see the blades creating variable sized apertures, giving quite unique out of focus patterns. A very wayward lens quality, and models that refused to work, even when fitted with new batteries, resulted in the camera rarely selling in the UK, and I remember in the mid 80’s seeing these in boxes for £5.
The twist in the story is that some Austrian student nutters came across the camera in 1993, loved the unpredictable/streaky/light leaky results and decided that it represented a change to the established order (or something, I never quite followed the manifesto), and they sought out the manufacturers to build them again. When various fashion models and celebs were seen carrying the LC-A it became the must have accessory. Cue the stampede to have one, eventually the sales of 2nd hand models got very silly, topped only by the price of the (camera) models (now made in China) that are on the LOMOGRAPHY webstore. I cannot criticise them for their success, for not only is the success of the LC-A responsible for the upsurge in 35mm film now available, they even made 110 cameras and made 110 films to go with them.
Even a brief web search will reveal thousands of typically vignetted, incorrectly exposed, colour unbalanced shots, and lots of night exposures with streaked headlights and so on. I do ‘get’ the enjoyment of the unpredictable outcome, but I do find it mad that people are happy to waste god knows how many failed shots to get one accidental success… why not buy a good, cheap RELIABLE camera and shove some COKIN filters on it, if that’s what you’re after?
Having said that, there is much to enjoy with the LC-A. Peering through the viewfinder you can see a charming series of icons for each of the click stopped main focus settings, if you’re lucky the sliding pointer MIGHT even line up with the correct one (mine doesn’t), you can marvel at the genius of the battery check red led in the top left corner: genius until you get blinded by the damn thing EVERY time you press the shutter release. If that’s not enough there’s another one top right to finish you off while telling you that the exposure is longer than 1/30!
But for me the real winner is the inclusion of a baseplate provision to mount a motor wind… that was never made! The aforementioned Cosina CX-2 had this feature, and they even made the winder… but good luck to you in finding one, they are very thin on the ground.
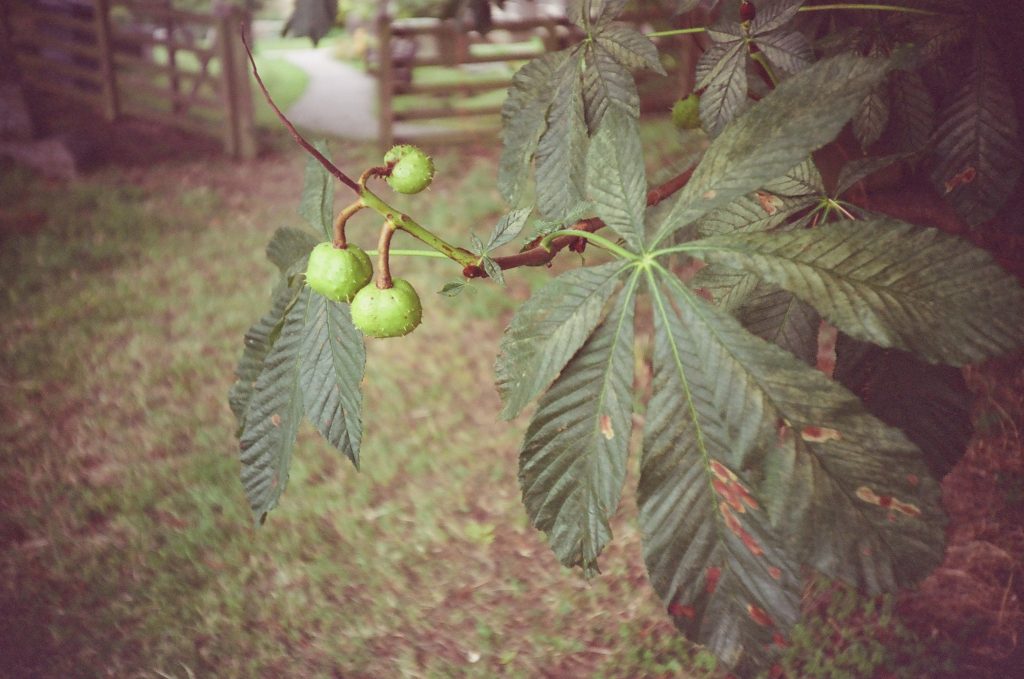
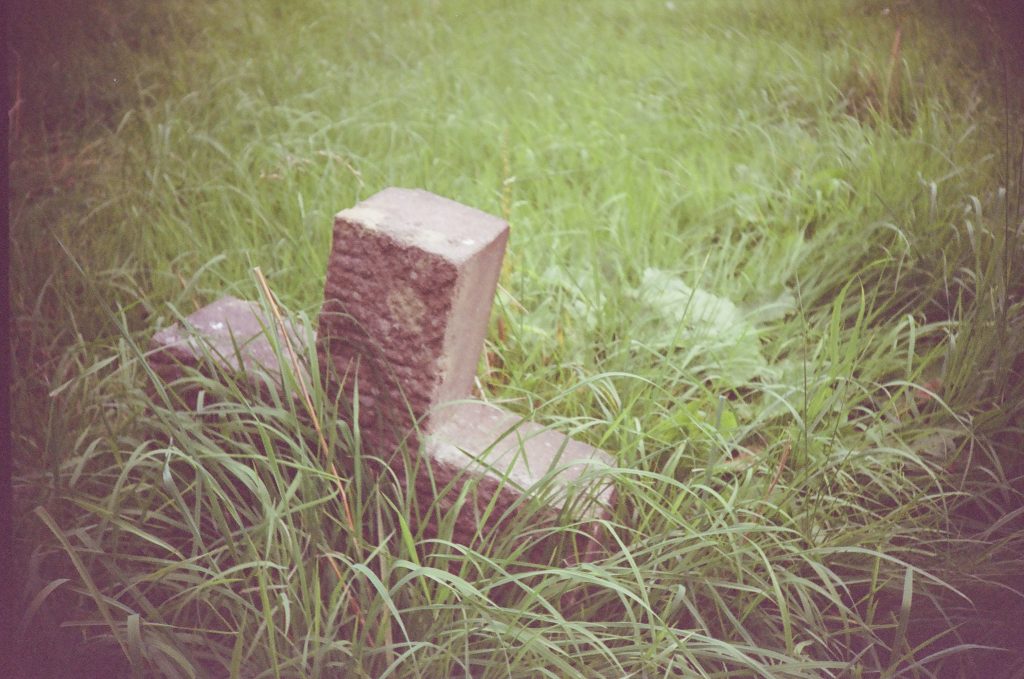
Even the best made Russian cameras have their quality quirks – my example has a correctly working back latch, but you have to apply a certain amount of pressure to the back door to get it to release – all part of the fun. The sample shots show the unmistakeable vignetting, and swirling out of focus patterns, and while the quality is unarguably not high, there is something about the combined effect that recalls/captures a bygone age – especially when shooting on ancient stock (I used 2005 expired Kodak High Definition).
A fave trick is to cover the light sensor to force the camera into a stupidly long exposure – I’m sure that my example tends to double digits, not 2 seconds, possibly it’s the battery signal trundling along mediocre soviet wires that makes it take longer shots?
The ebay average price has dropped to a more affordable £50 for a good clean working LC-A (whether it says zenit or lomo makes no difference value wise), and new China made ones from LOMOGRAPHY are an eye watering £275+. You pays your money, and takes your choice – good, bad or (most likely) indifferent!
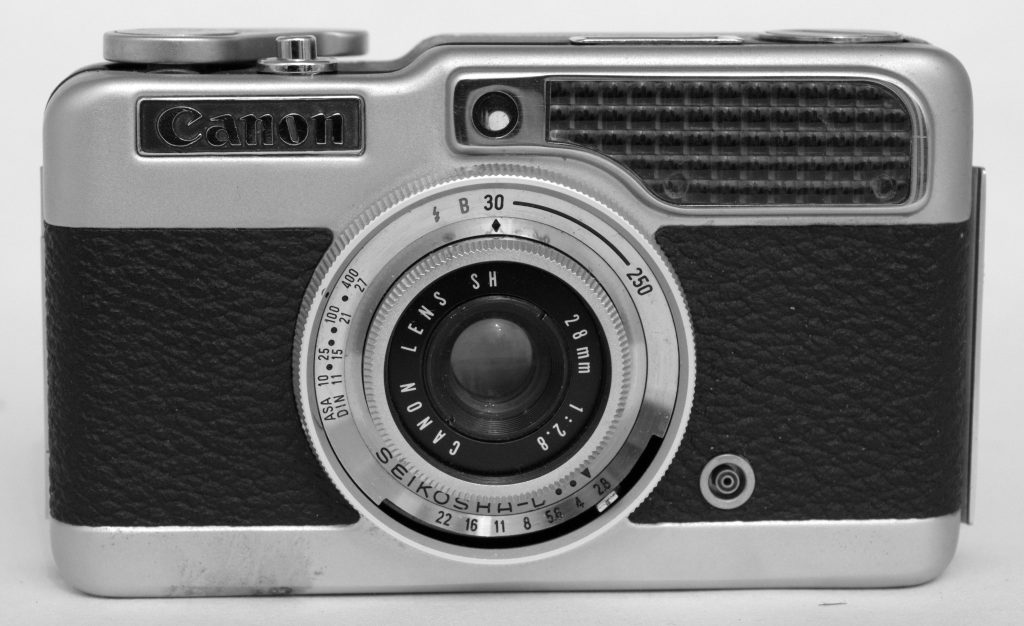
Trying out a… Canon Demi
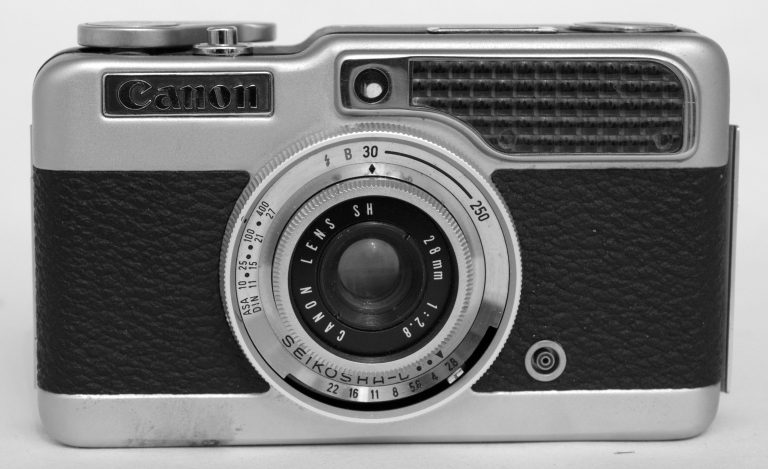
The Canon Demi from 1963, was Canon’s answer to the Olympus Pen camera, originally launched in 1959. The huge success of the Olympus Pen made many other Japanese manufacturers jump into the half frame boom with Canon being very successful with their range of cameras.
The Demi is a very useable and slim sized camera, with program mode (plus B and flash synch settings), manual focusing and lever wind. Over the next six or seven years Canon would produce several variations on the original Demi design and they would also produce their most famous, most quirky and original half frame camera – the Canon Dial 35.
The Olympus Pen was successful due to its easy handling, it’s superlative lens quality and the economy of half frame format – it was a camera that was designed to be pocketable and always ready for action. Canon used this same set of criteria in designing the Demi, although it is slightly bigger than the Olympus Pen, but then it does have the built in meter. The camera is nevertheless pocketable – the main controls all surround the lens and are proud of the body by about 4mm, but any snagging or damage is avoided by using the clever push on/in lens cover, which makes for a very smooth profile. The camera was also supplied with a zip case and wrist strap.
The camera is very easy to hold and very easy to use, with all controls falling comfortably to hand, the wind on needs a single stroke to wind on the film, ready the shutter and move on the frame counter. Space has been saved by the clever cutaway in the film cartridge compartment, and the rounded corners of the body mean that it’s will slip in and out of the pocket very easily, thus improving readiness and usability.
The viewfinder may look very small, but it uses several glass elements which produce a very clear image: there’s no brightline or parallax indicators but it is perfectly usable and gives a decent representation of the area that ends up on the film. Focus is by guestimate and the lens has click stopped icons with the usual head for close-up/portrait, several heads for medium distance and mountains for infinity – handily there’s a plate on the back cover showing the actual distances which these icons represent, from just under 1 m through to infinity. The user manual shows a different plate with the Canon company name and details – whether that is rare or mine is, I don’t know!
You choose between program, bulb or flash mode with the ring around the lens – this is also used to set the meter sensitivity. The camera uses a manual flash sync of 1/30 of a second with the aperture being set with the click stopped aperture selector, positioned to the bottom of the lens front, the lens clicks from f2.8 through to f-22. The Bulb setting also uses the aperture control in the same way, and finally the program setting can be selected, with a steeples 1/30th @ 2.8, through to 1/250th @ 22. The large selenium cell on the front of the camera on my example still works quite accurately, which for a well over 50 years old camera is something of a miracle – it would be possible to use the camera even if the meter was dead because the program shutter works independently of the meter, but it’s very handy having the match needle system in the top plate, it’s very quick and easy to use and with the camera at eye level you can fire off a series of shots quickly, it being half frame there’s only a short amount of film to move each time.
That lovely slim profile isn’t spoilt by a cold shoe – instead Canon supplied a small clip which slots into the edges of the back door latch allowing a flash/bulb to be used, the pc connection is at the front of the camera. This is a relatively scarce accessory and sadly I don’t have one! This being a camera from the early 60s it’s used a flash reflector and peanut type bulbs – but of course you can use a later electronic flash. The other clever thing of the design of that bracket is that it slots onto raised edges that surround the back door latch, so it’s actually quite difficult to accidentally open the back door.
A series of filters were also available which screw over the lens, but not the meter, so there are dots above the aperture selector to help with the filter factor that needs to be applied, but I can imagine how often people would have got that wrong – and forgotten to remove the orange filter when they changed to colour film as well!
As with the Olympus Pen the lens on the Canon is very nice quality indeed, pleasantly sharp, even wide open, and is really a stellar performer when stopped down a couple of stops. The inherent depth of field that you get with half frame cameras does mean that you can be quite slapdash with the focusing – even when working at maximum aperture – you can’t get away with murder but it means you can confidently take snapshots knowing that you going to get reasonably accurate images. Leaving the camera set to the middle-distance and stopping down couple of stops makes for higher than average success rate.
The models that came after this all added more functions, higher range of shutter speeds, brightline finder, CDS instead of the selenium meter, faster lenses etc, but these all added to the bulk of the camera and for me they don’t have the the same “classy-got-it-right-first-time” appeal of the original Canon Demi.
In these days of Mirrorless interchangeable lens digital cameras, one of the Canon Demi models is very highly sought after – this was the Demi C. This was almost unique in offering half frame format with interchangeable lenses – f2.8 28mm and 50mm lenses. ‘Buy-it-now’ isn’t an indicator of true value but these kits do go for several hundred £’s – a good condition Demi should be up to £50 max – including box. If you want to really make a collection there are also three colour variants of the Canon Demi – available in red cream and blue finish, with a matching colour zip case. As with most of Canon’s 1960’s output there are ‘Bell & Howell’ badged versions.
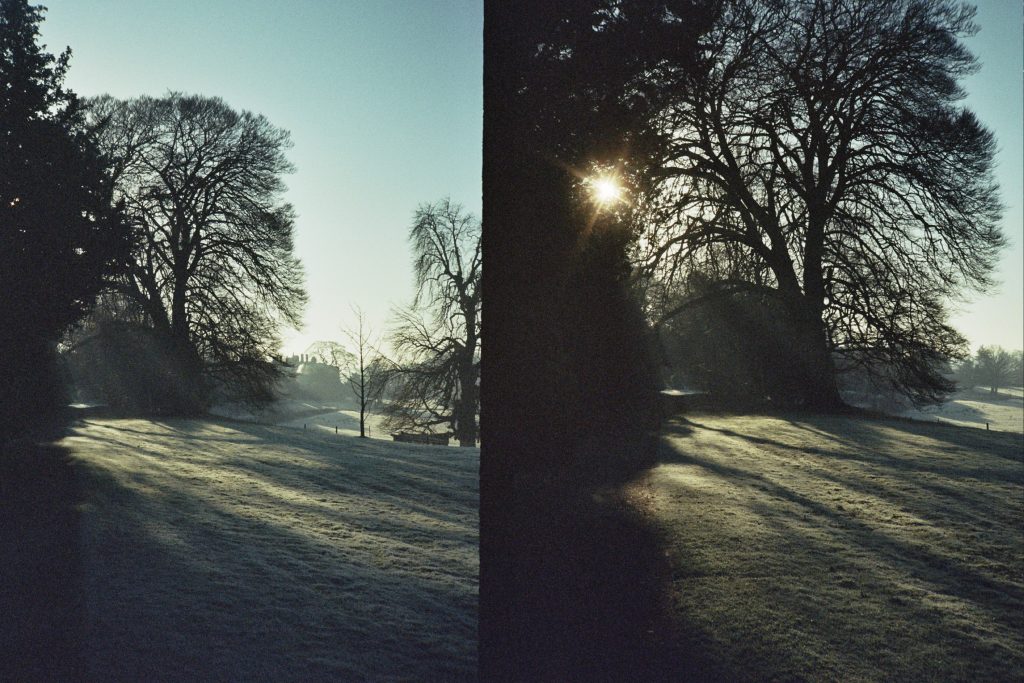
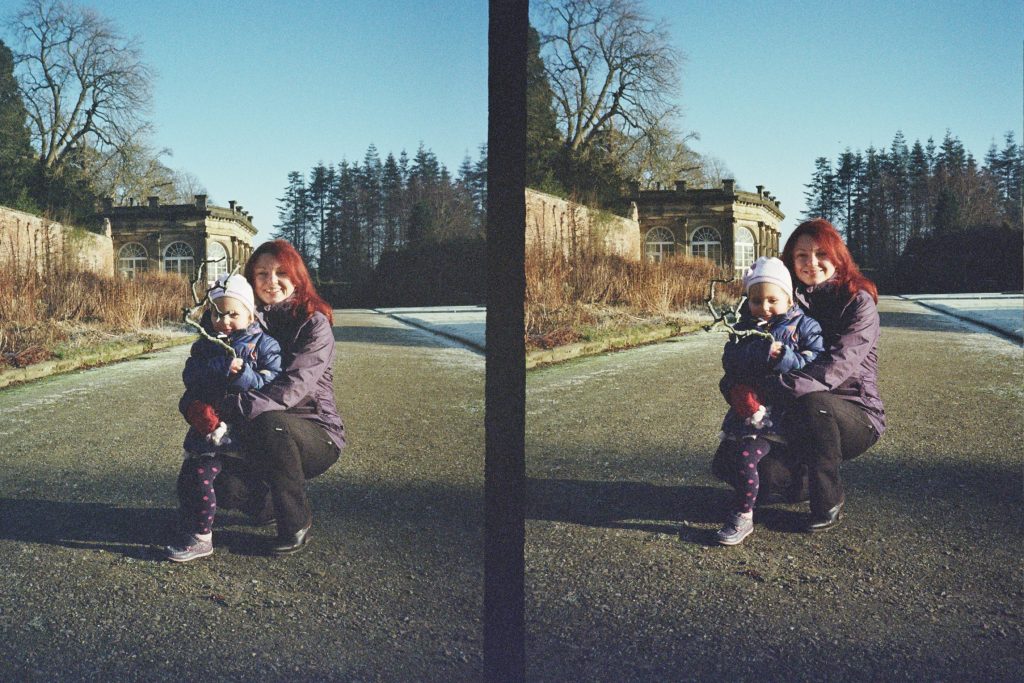
If you’ve never tried half frame photography the Canon Demi is a great starting point. If you’re lucky enough to have a high Street processing house do as I do and have the film processed and scanned direct to CD – you end up with very charming side-by-side frames, and deliberately shooting pairs of images, especially portraits can be very effective.
Why not give it a go?
Trying out a… Mamiya 16 Automatic
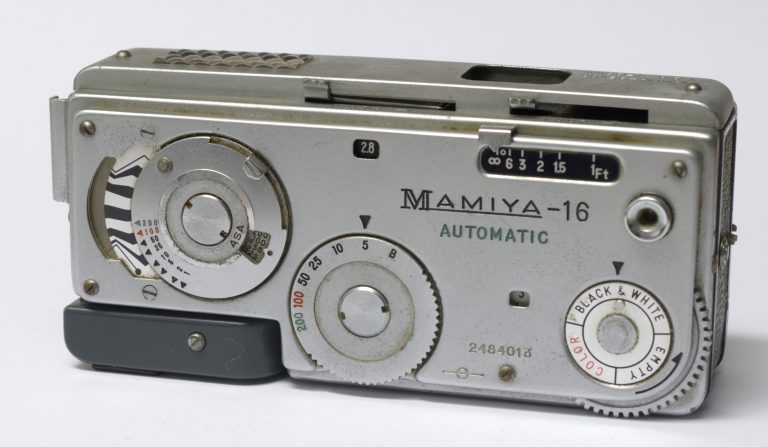
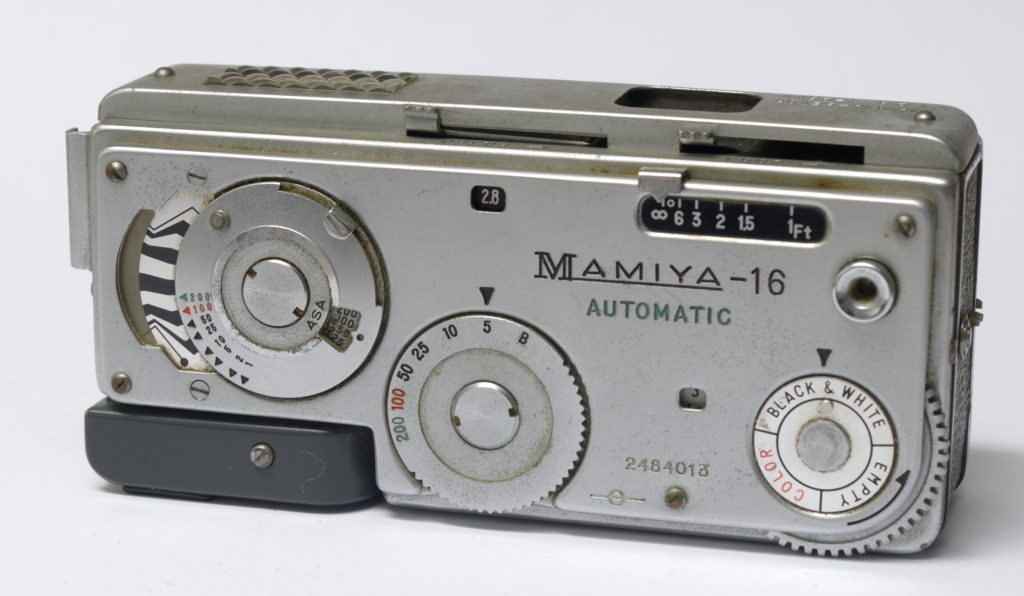
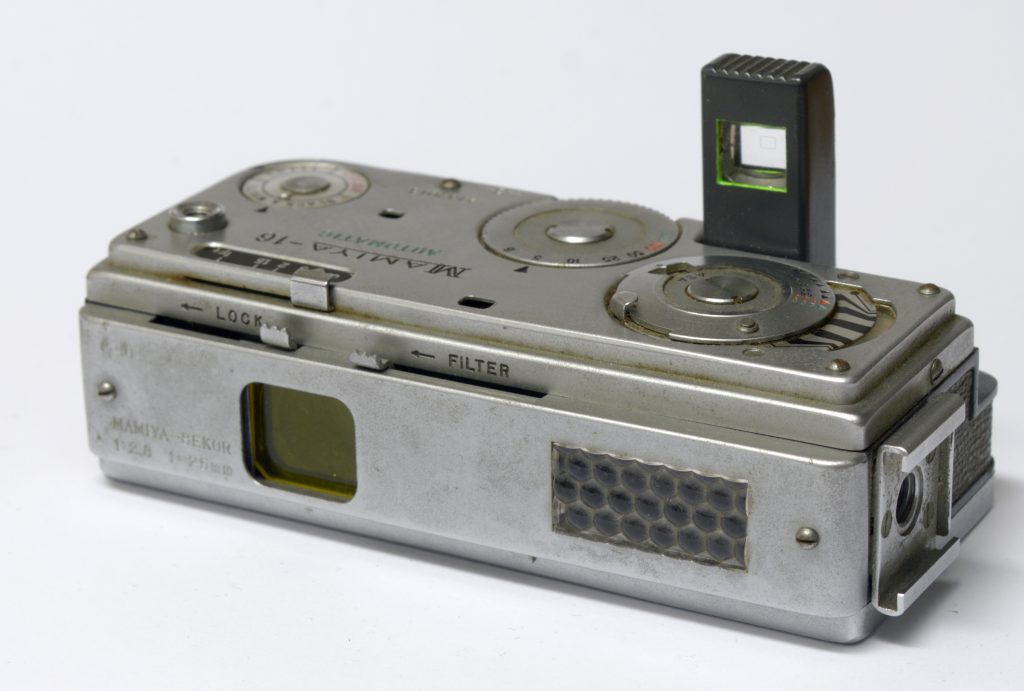
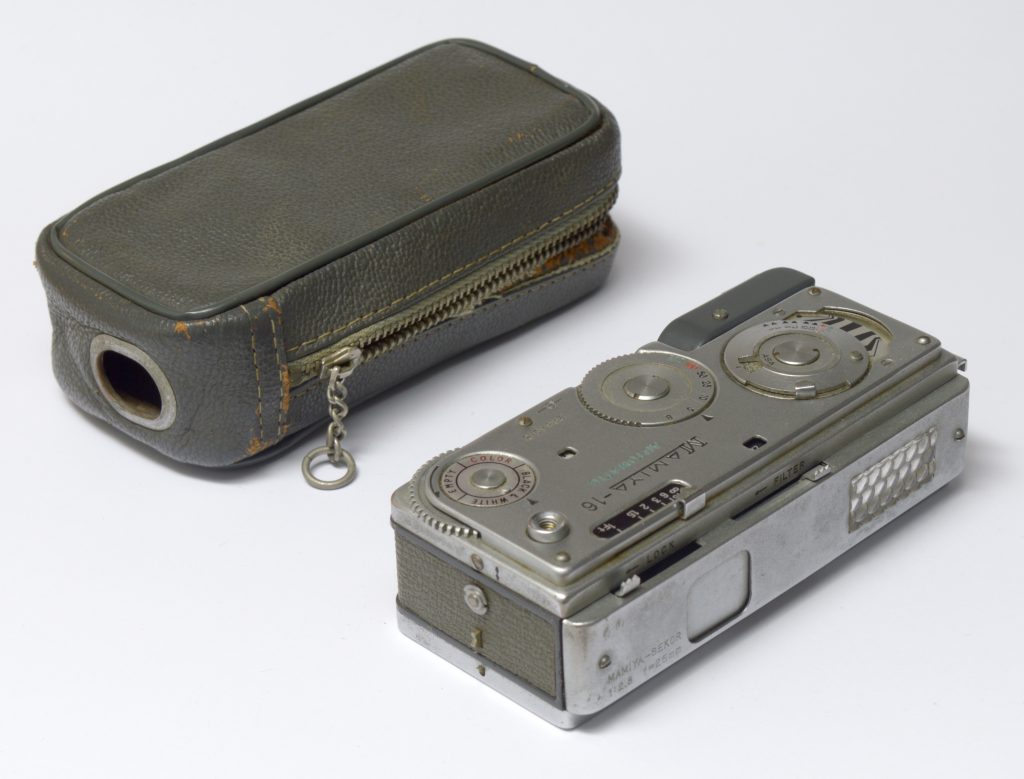
The Mamiya 16 Automatic was a 16mm subminiature camera introduced in 1959. Mamiya had launched their first subminiature, the Mamiya 16, ten years earlier, and found immediate success with it, allowing them to release minor spec updated models every few years, all of which are prized items in collectors circles.
The original Mamiya 16 is roughly the size of a box of matches, and although slightly limited by having a fixed focus lens, it was quite capable as a snapshot camera. The models after this (Super, Super II, Super III) all have a focussing f3.5 lens and a decent range of shutter speeds.
The 16 Automatic is clearly based on these cameras but with some major upgrades. A newly designed and faster (f2.8) lens, ingenious flip up viewfinder with brightline frame (instead of the pull out frames of the earlier models), shutter wind interlock, and most importantly an almost too clever exposure system!
Depending in which decade you grew up (photographically speaking), the term ‘automatic’ will have a different meaning. For me (in the mid 1980’s) ‘auto’ meant auto exposure, but within a year or 2 it would mean autofocus. In 1959, auto would be applied to functions that still involved serious manual labour.
Here’s the procedure to use the so-called automatic function of the Mamiya 16.
Set film speed on exposure surround dial. Set shutter speed at preferred speed. Point camera/meter at subject. Turn exposure dial until needle lines up with shutter speed on exposure surround. If needle points either side of speed choose another speed and repeat procedure! Apply filter factor that may be required… Take photo.
Alternatively turn the meter surround to set required aperture, visible in tiny window on top deck. Read off indicated shutter speed from needle. Set this shutter speed on shutter dial. etc etc
Now, does the word ‘automatic’ spring to mind? Hardly!
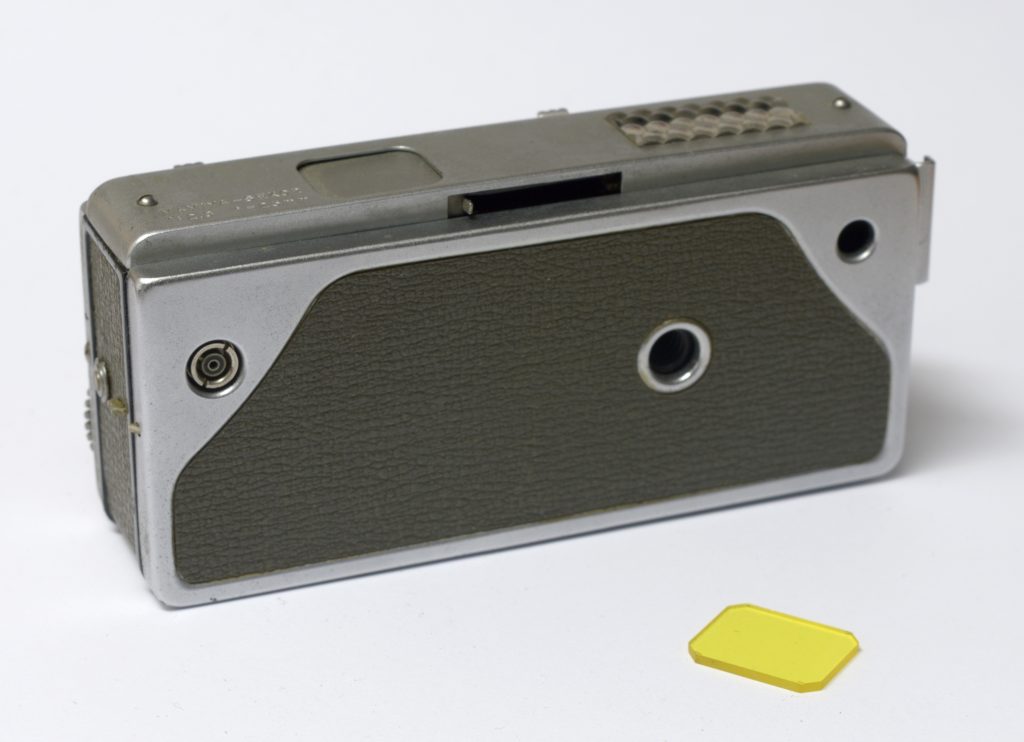
All criticism aside, the camera can be used in this ‘nearly’ aperture/shutter priority mode, or you can use it purely manually, as you can set both aperture and shutter speed independently. The important thing is that the camera is a very capable performer. Some nice touches are the sliding lens cover/shutter lock and the sliding filter switch, which is returned on closing the camera lock – there’s a sliding hatch on the underside of the front plate to insert the filter, and Mamiya made the usual black and white contrast filters (and a neutral density) all in good quality glass. These were available in storage pods, and the rectangular filters have nice angled corners to assist when putting them in and out of the slot.
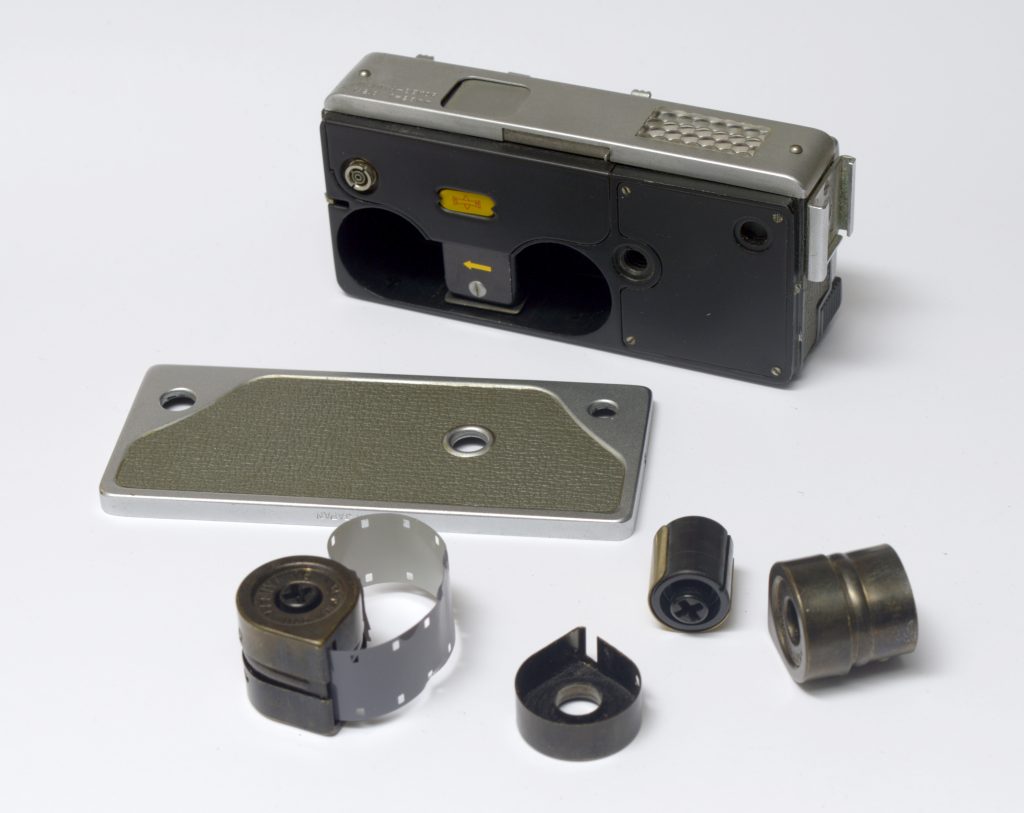
This camera was a very early addition to my collection – I already had an early Minolta 16, and was on the look out for my first Minox, but seeing this at a fair at Allerton Grange (Leeds) in the mid ’90’s I was struck by the weight of it (it’s surprisingly heavy) and the gadgetiness of the mechanism – it seemed to be working ok so I handed over the money, not too sad about the sorry state of the zip case. I took the dealers word that it would take the Minolta 16 cassettes which amazingly were still available new at that time (it doesn’t) but hoped I’d find some original cassettes at some point. I actually got my cassettes through a club member who had bought some thinking they were for his Minolta 16!! Mamiya made single drum versions (as here) and did eventually make their own variant of the bridged twin drum style that the Minolta uses. The drums are brass and very well made, with slip on caps and pimples to hold them in place. The film is slid under the strong clip that surrounds the take up drum – the spool os turned by the big cross head so has a very positive action on winding.
16mm subminiature SHOULD have taken over the photographic world, but sadly the subminiature makers would never commit to one cassette format, so although popular at an enthusiast level for most of the ’50s, it never fully caught on, and it would be (almost inevitably) Kodak who would clean up with a simple to use cassette mechanism (Instamatic) in 1963, albeit with a larger format, which was incapable of producing the quality that a well exposed frame from a 16mm camera could. As I’ve mentioned before in these articles, it’s only now with ultra fine grain films that you can appreciate just how good some lenses are on 1950’s and 60’s cameras. I’ve regularly printed 10×8″ prints from subminiature – has anyone ever printed anything larger than postcard from an Instamatic? No, I thought not…
An indication of the enthusiast popularity of the format is borne out by the excellent accessories that were made for the Mamiya. Along with flash guns (of the bulb variety) that used a bonkers ‘attached thru the tripod socket’ approach, the afore mentioned filter sets, an oversized screw in steadying handle that completely ruins the subminiature point of the camera, there’s possibly THE ultimate add on – the ENLAhead. This ever so clever gadget was a screwed extension tube that attached to almost ANY enlarger (with lens removed), and had its own enlarging lens built in, along with a 16mm film strip carrier – anyone who has ever tried to faff around masking off a normal 35mm neg carrier and use a standard enlarging lens with a subminiature negative will appreciate the genius of the design – NOT needing to put your enlarger head at totteringly high distances from the printing paper is a real bonus!
Mamiya produced two more models in the range after the Automatic – the almost minimalist Delux (with its sublime parallax correcting viewfinder) and the 16 EE, which is a chunkier but clunkier version of the Automatic, before quitting the subminiature field in the early 60’s.
The Automatic ticks all my collecting boxes – useable, quirky, intriguing and surprisingly cheap – expect to pay around £30+ for a really clean one. Although the selenium cell is likely to be dead, the shutter blade mechanism is very sturdy so the camera will still be useable. The cassettes on the other hand may cost as much as the camera, the ENLA head ditto. But at least black and white 16mm film is still available (a 100 foot reel of FP4 costs about £50 – enough for 60 full cassettes) so you could be shooting with these cameras for decades to come – and compared to trying to continue to use your polaroid collection, that’s peanuts… although not IMPOSSIBLE!
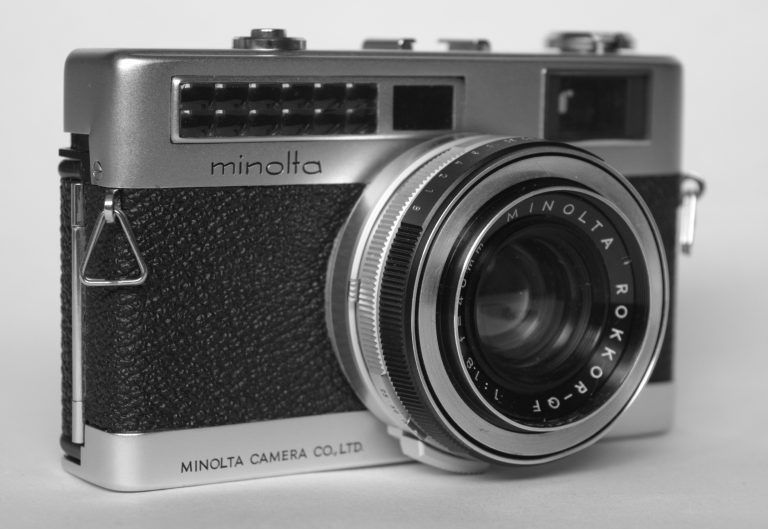
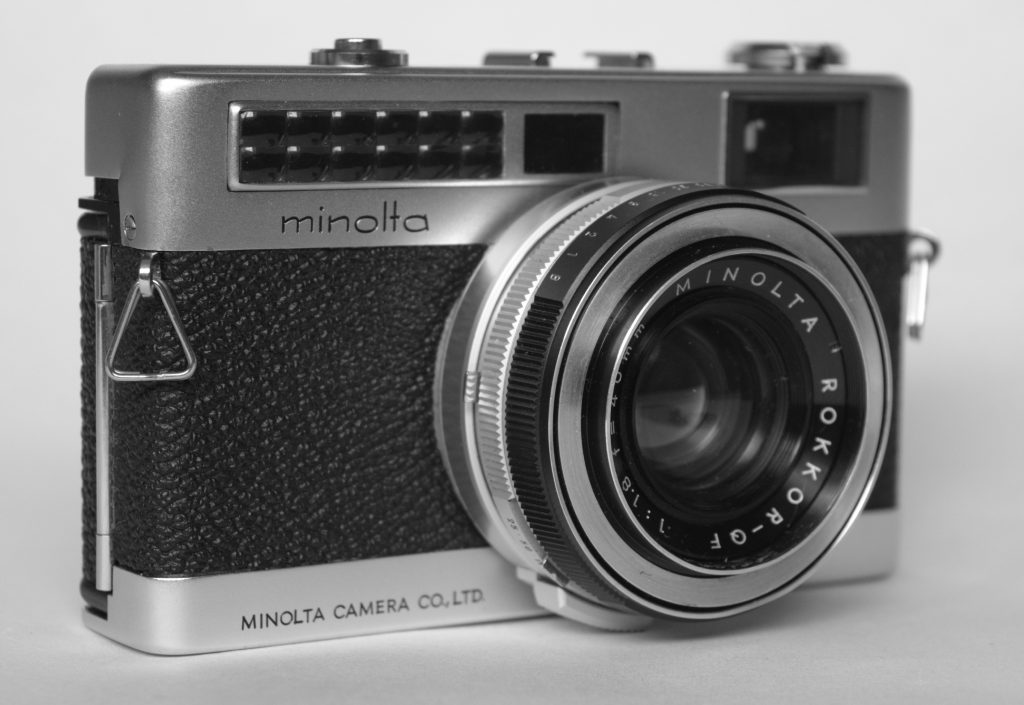
The Minoltina – S is a 35mm, fixed lens rangefinder introduced in 1964, and features a non coupled selenium meter, 1 – 1/500th shutter speeds and a relatively fast (f1.8) 40mm lens. This is one of those cameras that you may think you’ve seen at most fairs, but trust me, it’s not common. The Minoltina is a beautifully made and well specified camera, but it seems to have suffered from a lack of belief from the marketing dept. It’s not unusual that Minolta would produce a basic model at the same time (the Minoltina P, which has no rangefinder and less speeds) but sadly they just couldn’t decide where the future (or the past) lay – even a quite thorough trudge through internet land has failed to provide the absolute info on when the S was produced, why it was also engraved as AL-S, and why they chose to release a CDS meter version less than a year after launch – badged as AL-F (I think!) – talk about an undeserved death sentence. Minolta had been making fixed lens rangefinders through the mid – late 50’s which usually had 45mm optics and relatively large bodies. In 1962 they introduced the half frame Repo camera – this camera and it’s follow up are clearly the design forerunner for the Minoltina rather than the beefy earlier cameras. Why they didn’t use the name ‘minoltina’ for the svelte half frame camera range isn’t known – it’s a memorable and appropriate name after all. They also continued to produce the bigger cameras throughout the 60’s – along with every technological and format change that occurred – a look through the Minolta pages in Mackeown’s will reveal just how many models they produced. For all these reasons the “S” was always going to struggle to be a big hit during the year(?) that it was produced. The mid 60’s were a period of rapid development and supposedly miniaturization, but any reader who has carried a typical mid decade overweight SLR for more than 10 minutes will know that it was actually all to do with marketing hype (rather than true progress – nothing changes, it’s the same today). And for non SLR cameras this hype was even more extreme: Selenium cell? “that’s SO 1964” f1.8 lens ? – move over slow boy, we need an f1.4 All mechanical shutter mechanism – why would you want that when we can provide you with a battery reliant (and hungry) CDS powered camera? Then the transistor came along and really spoiled things. The shame is that however revolutionary it was to have a semi auto camera that could fire the shutter at 1/326 of a second (eg the Yashica Electro), most of those cameras are no longer useable due to unobtainable mercury batteries (with their weird voltage supplies) and worse those same batteries have been left in, thus corroding the fragile wiring that works the whole thing. And of course they generally needed larger bodies to fit all the gubbins in! The Minoltina S is a true breath of fresh air – very slim in profile, totally useable even if the selenium cell has died (mine amazingly still works), a gloriously silky wind on, and a satin chrome body that is the equal of anything from Leitz. It’s all mechanical – need I say more? My example came with it’s original 2 piece ever ready case – this one has a short strap rather than the more usual over the shoulder style, and also evidence of the former owner written in black dymo tape inside (hello J.M.Benzimra if you are reading this!), and although in remarkable condition the camera has a few battle scars – the wind on lever has some scratches on the back of it (I’m still wondering how/why they got there!) and the R/F on mine is actually out of whack but I’m happy using guestimate focussing. Incidentally the camera has a rangefinder access port behind the lever – but even that hasn’t been enough to get it correctly set up – although that might just be down to owner inexperience. Other design quirks are that the aperture and shutter speeds are aligned at the 12 o’clock position (ie looking directly down onto the barrel) but the focus scale is offset to 9 o’clock! There’s also a barely readable depth of field scale to the side. The meter needle is visible on the top plate and uses a simple centering mechanism depending on the user to adjust either shutter or aperture. Finally the meter asa is set at the base of the lens surround. Although well specc’ed the Minoltina – S viewfinder has only a white line framefinder and the centre spot for the rangefinder – no meter display is shown – this would have kept the costs down, however so no bad thing. I bought this camera a couple of years ago as a “cheap enough to use and sell on to ebay later” purchase, but the condition and pleasure in use has stopped me from doing so. The shots produced are very sharp, and are typical from this age of camera while still having a definite character to them (I have a dislike of modern over sharp, over corrected lenses – my eyes have never been like that so I don’t want my photos to have that look!). The “S” is unlikely to ever be a true collectable with associated value, although there is a definite (and increasing) market (mostly in USA) for good quality useable film cameras – especially rangefinders- from this period. Now is the time to have a closer look at what’s on the sales tables at your local camera fair – the Minoltina S was a superbly made camera with a very good quality lens, is a relative lightweight to carry around or keep in the glove box/rucksack for occasional days out. After all a f1.8 40mm lens for ANY SLR will set you back a lot more than the likely asking price of that lens including this camera – typically around the £20 mark – peanuts for the gold it is capable of producing.
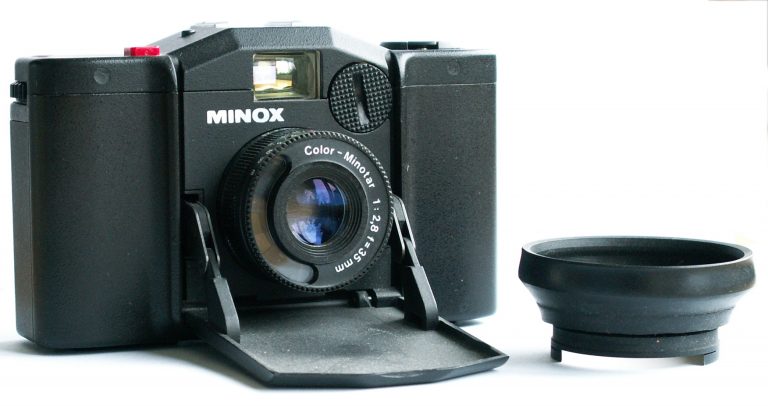
Trying out a… Minox 35 EL
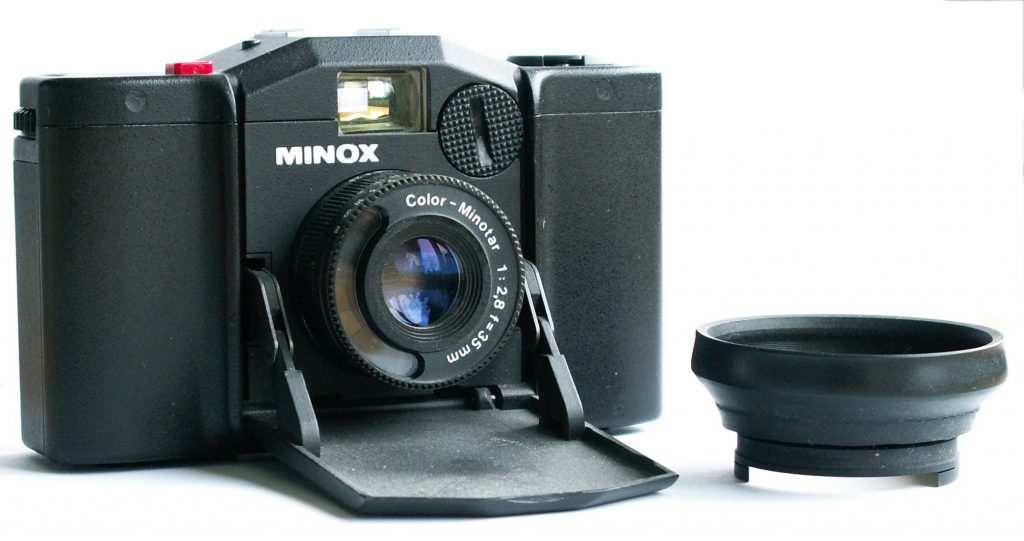
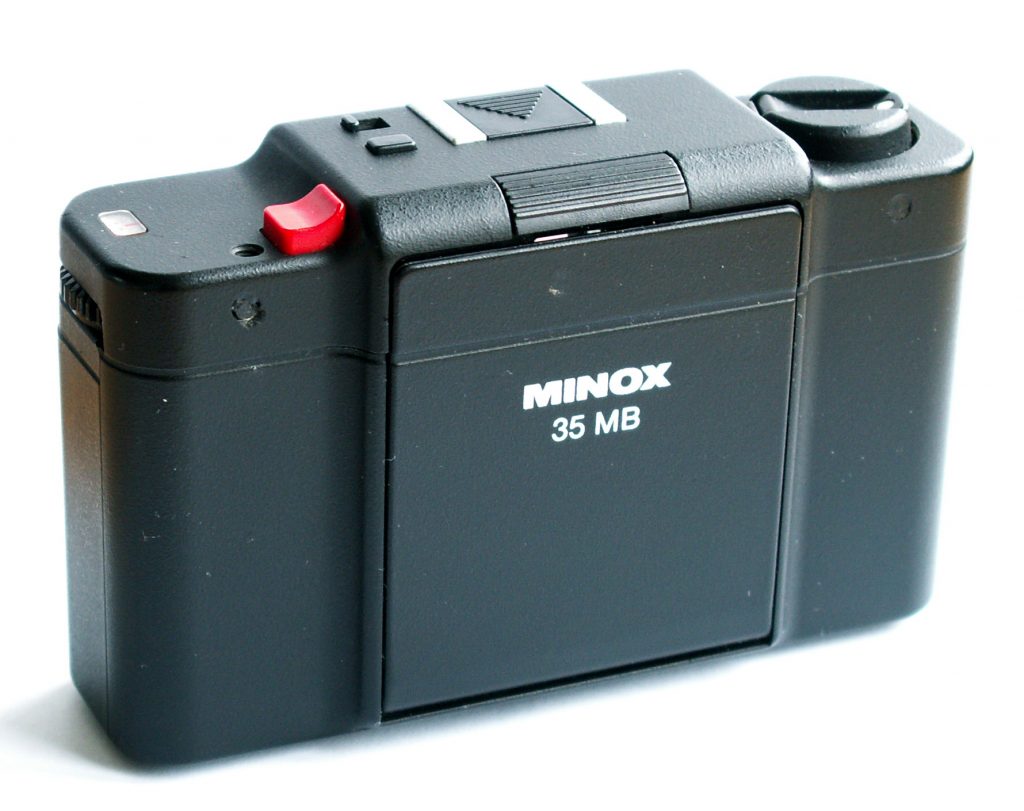
As a huge fan of Minox subminiature cameras, it’s perhaps not surprising that I also own a pair of Minox 35 cameras. I was aware of the cameras for many years, as they were often seen in high end dealer windows unmissable in their ‘tasteful’ gold and silver plated versions.
The camera was launched in 1974 to huge interest, and the fact that there are over 20 different variations in model, excluding promo versions, and production only ceased in 1998 shows how successful it was – this also means that it is an easy camera to find, and also quite cheap, a great bonus as it is a very capable camera.
Although the drop front design may not appeal to everyone, it does mean that the lens is well protected, and the camera is very small when closed. Its plastic construction gives a weight of only 190 grams and makes it a perfect traveling companion.
The origins of the design are a bit murky (to me at least!), there were versions by Balda, and also by Voitglander, and I don’t know who copied who, the only certainty is that the Kiev 35 IS a russian copy of the Minox! Ricoh also made a variation on the design, as a program only camera (the FF-1)
The Morris Moses book ‘spy camera’ contains a fair amount of info on the Minox 35, including the fact that early models had problems with the thickness of the die moulded body, resulting in light leaks in the first batch of the original model, the EL. I can’t comment on this, all I know is that my model is absolutely fine.
Most fairs in the late 90’s were selling these for about £100, so when I saw one on Ebay Germany for less than 20Euro, i jumped – a bit too quick, as I didn’t read the ‘achtung’ at the bottom of the details: It had a jammed shutter! A quick bit of googling revealed this to be common, and thankfully across all models it’s an easy fix: removing the shutter cover from the inside (4 screws) reveals the gummed levers holding the shutter blades. By manually moving these with a cocktail stick, it frees off and all is well again. So, for £12.50 I got avery clean camera, with a well worn, but useable case. The camera is aperture priority ONLY, with needle scale in the viewfinder, f2.8 35mm lens of excellent resolution and quality. It takes 2 strokes on the little lever to wind on, a button on the base to facilitate rewind (manual of course!). It’s hard to believe that a standard 35 cassette will fit in the body, but it does. The entire back and base is removed using a very sturdy lever on the base, and the cassette popped in place, film pulled across the gate: the pressure plate is built into the back, so there’s no flapping plate to deal with! The film sensitivity dial is also on the base.
I happily used this camera in many countries for a few years, but finding a model MB in non working order (I was confident it would be the same fault) for £18 was too good to miss. The benefits of this model is that it has more accurate LED readout in the viewfinder, a self timer, and most importantly, a + 1 stop switch – far more convenient than the old standby of fiddling with the film speed dial. I actually prefer the top plate design of the earlier model, but you can’t have everything!
There were a set of push on filters, with built in hood, but be warned: they are specific to certain models. The hood I have is EL only. The attention to detail always apparent in Minox gear is evident in the lovely cut out in the rim, so you can still see the aperture, and the hood gives you a better grip on the ring. The filters all came with their own beautifully made leather case, with belt clip, so if you are using a strapped case, they can tag along. However if like me you like to travel light, then the drop front can be utilised as a lens hood – but you will look a bit of a berk using the camera upside down.
There were 2 auto flashes available, one with a fixed head, the other a larger tilt head model. These compliment the camera very nicely, but do add to the bulk of it.
The only downside is that the cameras are battery dependent, but the battery check saves anxiety, and the battery lasts for ages anyway. The battery goes into the front of the camera (an improvement on certain rollei 35 models)
Although both my models are aperture priority only, there were also program types, and fixed focus ones: NONE ever had manual shutter speeds, and contrary to many ebay listings, there is NO rangefinder version. Here is a link for a full history and view of all major variations:
http://www.submin.com/35mm/collection/minox/35mm_variations.htm
I am constantly amazed at the quality of the images I get from these cameras, I urge all readers to get one and bung a roll or two through it, before film is gone forever.
Trying out an… Olympus XA
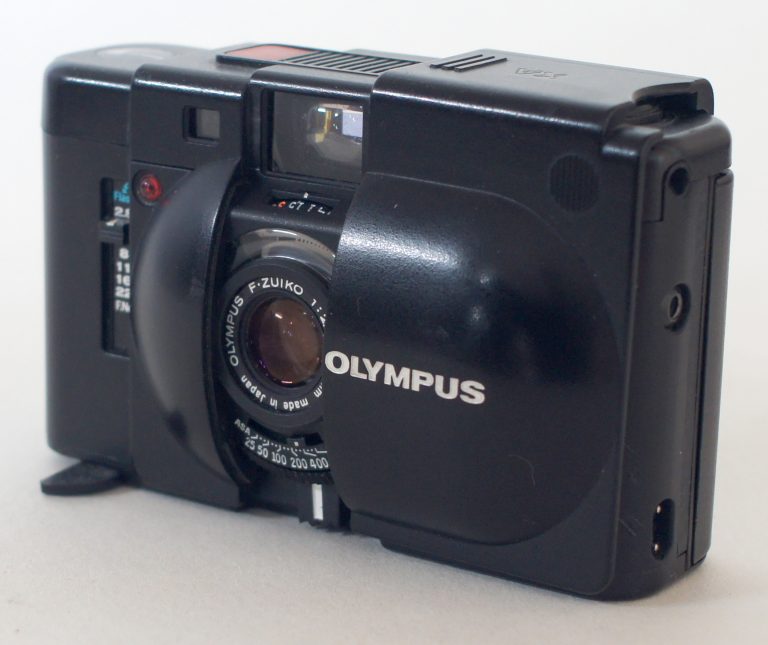
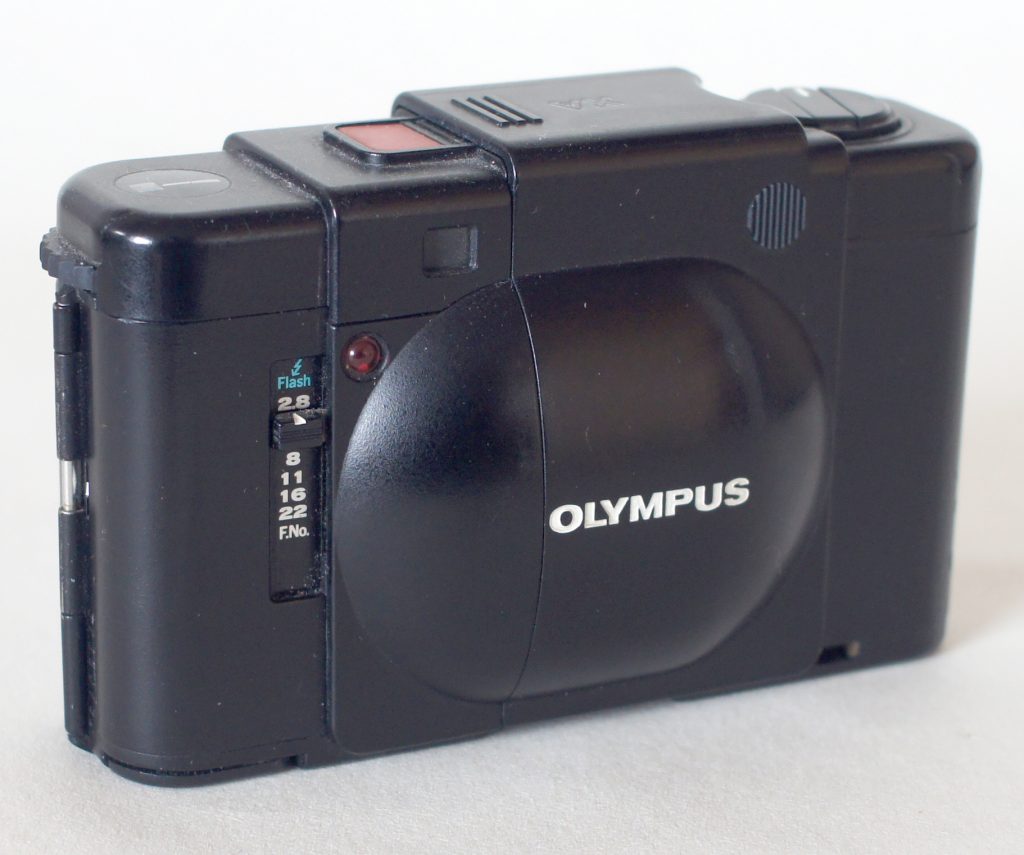
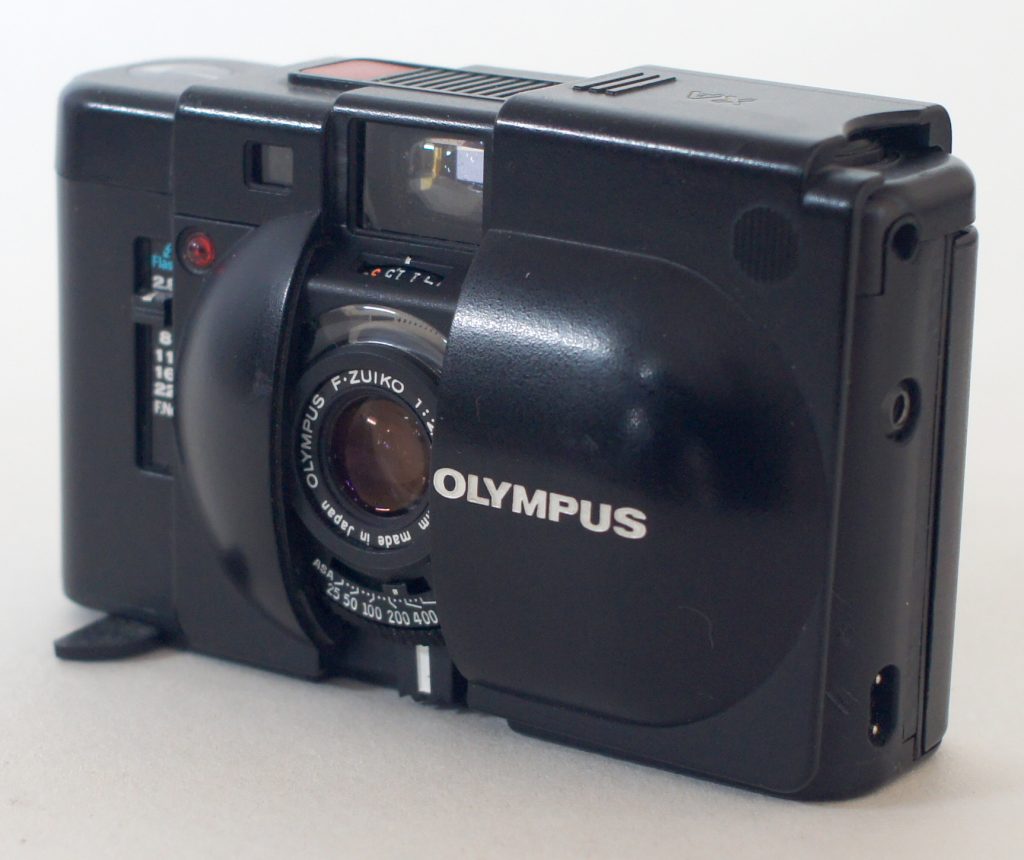
The Olympus XA camera was produced from 1979 and was the first of a range of five models (XA1, XA2, XA3 and XA4 followed). The XA is an aperture priority automatic camera, its specifications being an F2 .8 to F-22 35mm focusing lens, shutter runs from 10 seconds to 1/500 of a second. The camera has a built-in rangefinder and is focused using the small lever that situated under the lens, focusing from (as usual with this kind of compact camera) from just under 1 m through to infinity. To keep the camera small there’s no built-in flash, but instead two different sizes of (unique) flashgun were available which screw onto the side and although very handy, to my to my eyes, they spoil the lines of the camera.
The camera is very small indeed, and fits easily into the palm of a hand. One of many really lovely touches is that the lens is protected when camera is not in use by a sliding shell that switches off the battery circuits, so you don’t have to worry about flattening the battery when it’s in your pocket, and also because it switches everything off the electromagnetic shutter release is locked as well.
The camera looks fairly basic as there’s no obvious controls, but that’s deceptive – the camera is very capable: the aperture range sits to the left of the lens, and is a sliding bar which, when pushed all the way to the top sets the lens stop for flash use and also fixes the shutter speed. You slide it to the required aperture and let the camera choose the shutter speed. The meter sensitivity is set with a click stopped lever which is also below the lens. The viewfinder has the rangefinder patch in the centre, and the meter needle can be seen so you know what shutter speed is being used by the camera. One of the many superb design touches is the 3 position lever thats on the baseplate. The first position sets the camera to increase the exposure by 1.5 stops in other words, a backlight control. The second position is a battery check, which produces an audible steady beep (or a squawk if the batteries are running low!). The 3rd position is the self timer, which is a 10 second countdown, with beep and also flashing LED on the front of the camera. This 3 function lever keeps the number of controls to a minimum and yet adds tremendous capability to the camera – having the (flat) switch move out to the front edge of the base plate means it also acts as a steadying arm when using the self timer – now that’s design that is World class.
The batteries are loaded through the slot on the base plate, which also has a tripod bush. The body has no strap lugs, but as the camera was aimed at the ‘on-the-go’ photographer there’s a barely visible recessed area on the back door hinge that accepts a clip mounted strap.
The XA is wonderful to use as a general snapshot camera, but the focusing capability and semi automatic control make it a very, very versatile camera indeed. The lens is truly amazing quality and can compare favourably with most professional 35mm lenses.
The legacy of the Olympus Pen and TRIP models are much in evidence with the XA (indeed the XA and the Pen were both designed by Yoshihisa Maitani).
The thumbwheel advance may seem too basic, but it kept the profile of the camera very smooth, and after several million production units on the various Pen cameras, was clearly a favourite of the designer!
The succeeding models all look pretty much the same, but were aimed at very different markets.
The XA1 is a single mechanical speed model with selenium cell control (much like the later Pen cameras) and has a fixed focus lens, the XA2 (an incredibly successful model) has program mode ONLY with 4 position zone focus, XA3 is a DX coded version of the XA2, and finally the XA4 is (more or less) a copy of the XA but with a wider 28mm lens with macro focus capability – and proved a hit with estate agents keen to take impressive interior shots of box-rooms that looked like grand ballrooms!
I bought my XA at a fair a couple of years ago, fully intending to sell it on (it was in such lovely condition I couldn’t resist), but both the sublime picture quality and functionality of the camera have stopped me from doing so – there’s truly no excuse for NOT having a film camera to hand with so small a package – getting professional quality in a camera readily available for under £30? Who needs a Leica CL?!
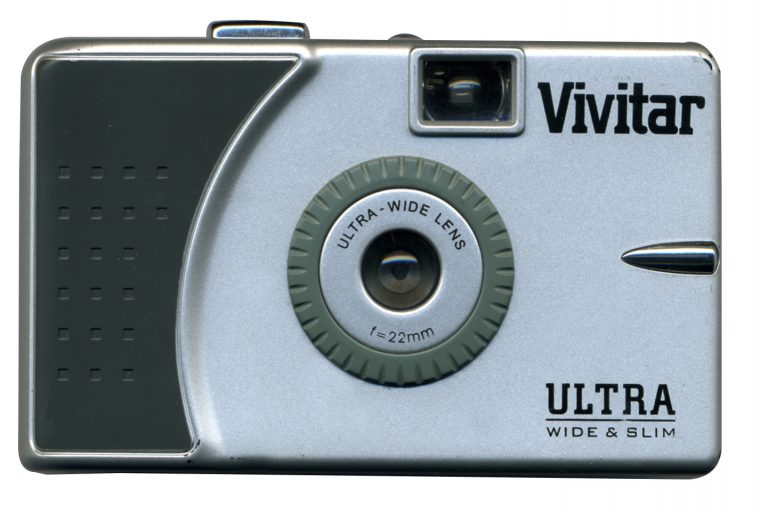
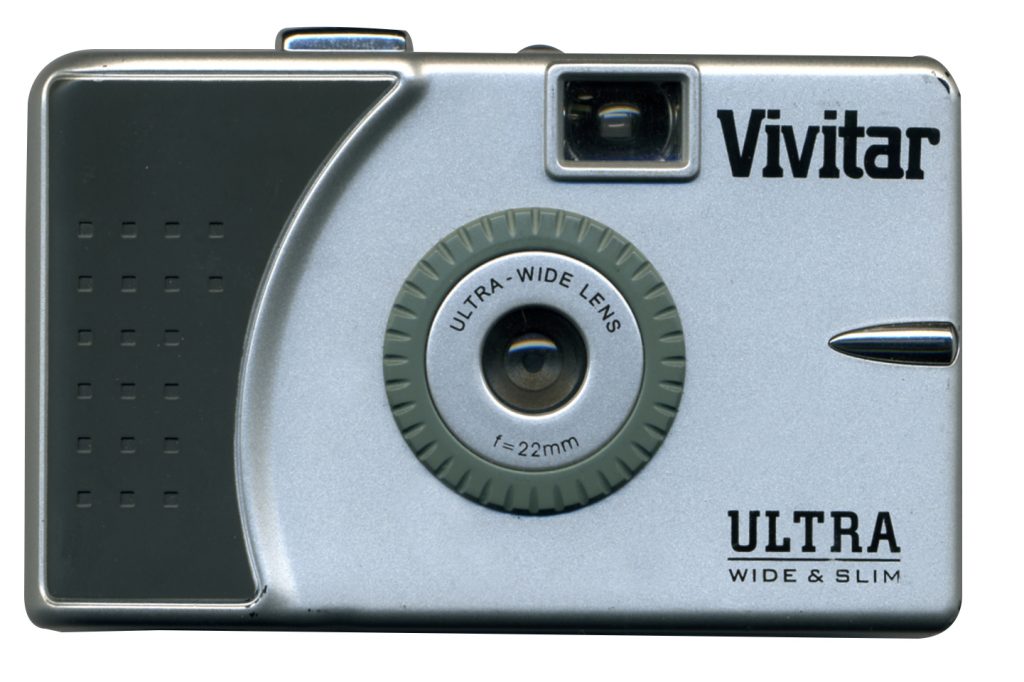
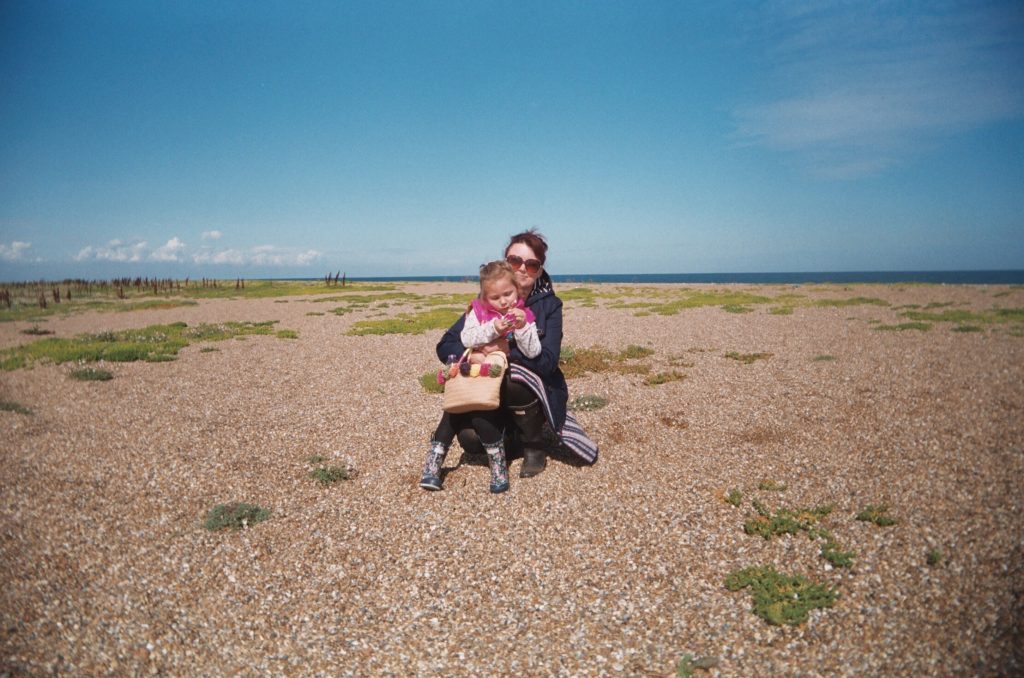
One benefit of being known as a camera collector is that people occasionally give you ‘gifts’ of the photographic variety. The Vivitar Ultra Wide and Slim (possibly the longest ever camera name?) was such a gift – in fact it was 3 gifts! My eldest brother spotted a stack of these cameras in the local poundshop in the early noughties. They were brand new, unused stock, and boxed. He thought that I might like to pull it to bits to try the wide angle lens on my Sony Nex digital body. A great idea but the distance from rear element to film plane is too small for that to work on the Sony. So, I ended up with a destroyed example, a user sample, and one that I’ve kept unopened as a time capsule. Total cost so far – £3! The funny thing about all this is that had he bought the whole stack of boxed cameras it would have been a nice little earner – the UW&S (to give it it’s hipster name) now regularly sells to the LOMO brigade for up to £50 a time… Deciding that this camera would be a clear contender for ‘trying out a…” it made some kind of sense to me to match it up with that other poundshop favourite – Agfa Vista colour negative film, also a pound a pop! I wish I’d stocked up on this film – it’s not Velvia, but I certainly prefer it to ‘real’ AGFA, which always seemed too muted to my FUJI film tastes. Sadly that initial batch of film very quickly sold out. So, to the camera. It’s a focus free job with an f11, 22mm lens, so depth of field is quite substantial – but the budget aspect (ie plastic lens) does mean that technically ‘in focus’ is offset by untechnically distorting like billy-o! Adding to the ‘basic is best’ approach the photographer has a choice of a single shutter speed – 1/125th, so it’s only really any fun on sunny days, with either a 200 or 400 asa film inside. 22mm is a very wide view indeed, and it’s worth remembering that the viewfinder doesn’t show anything like the true angle of view, so you’ll nearly always have more on the film than you thought possible… Film is loaded in the usual manner, the hinged back door has a decent spring catch to open it, and wound on with a thumb ratchet wheel that protrudes from the bottom left of the rear body – forum opinions advise never winding the camera on until you are about to shoot, as the tension on the spring(s) can end in disaster – ie it stops working! This goes against my lifelong habit of shoot-wind on, but who am I to argue with the experts… The ‘Ultra Wide & Slim’ name is entirely fitting, the wide bit relating only to the lens view, the camera itself is very slender, and has some nice touches – a raised handgrip area on the front, frame counter window on the top deck, and chunky surround to the lens which should help keep stray fingers out of the way! It even comes with a wrist strap, which probably doubles the overall weight of the package! I found that the camera is capable of very nice results in the exact right conditions, and capable of so so results in most other conditions! Blessed with a very sunny day at the seaside last year I ran a film through, both into the sun and against the sun, and got a set of ‘interesting’ photos. Shots taken without the sun in shot are crisp and bright, and although vignetting is evident it all adds to the feel. Closer images (at about 2 foot) are not quite as pleasing, so best advice is take small group shots in very bright sun with a nice background! The flare is a matter of taste but is clearly a huge draw for the retro lovers on the continent and elsewhere – so much so that although the Vivitar Ultra Wide & Slim is long dead, it is still available via a number of clones – White Slim Angel, Black Slim Devil, Yellow Peace and Blue Ribbon to name a few. The clone versions are available for about $70, which is a pat on the back for the marketers, a punch in the face for the rest of us – but if you see one in the £5 box at a fair give it a go, and take it on your next summer holiday… along with a poundshop roll of film, of course!
Trying out a… Welta Penti
People collect cameras for many different reasons. The camera under scrutiny in this article could fit into collections for possibly the widest range of reasons than any other I can think of – intrigued? – Read on!
.
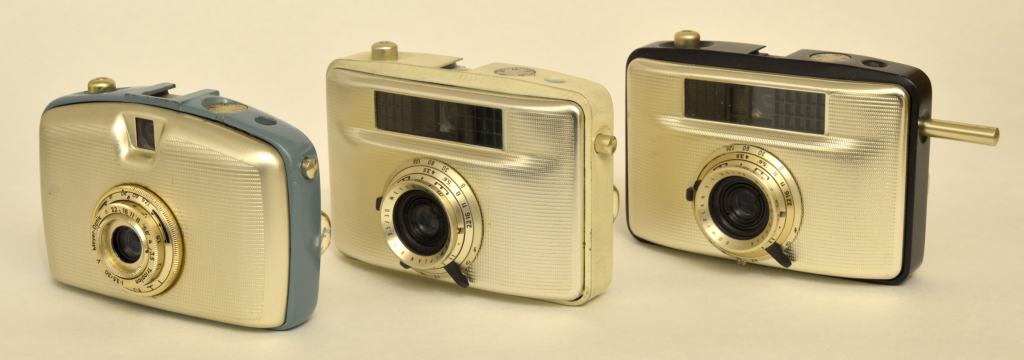
Wacky wind mechanism? Tick. Crazy European film cassette? Tick. Pre-World wide boom film format? Tick. Unforgettable ‘bling’ looks? Tick. Multiple colour finish? Tick.
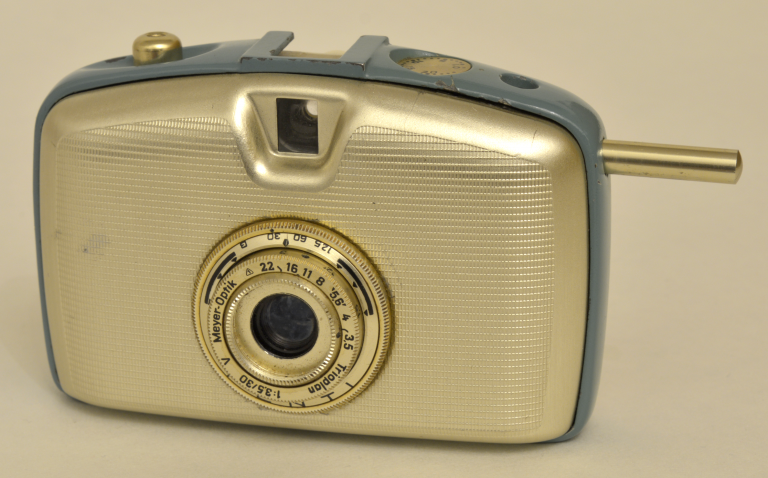
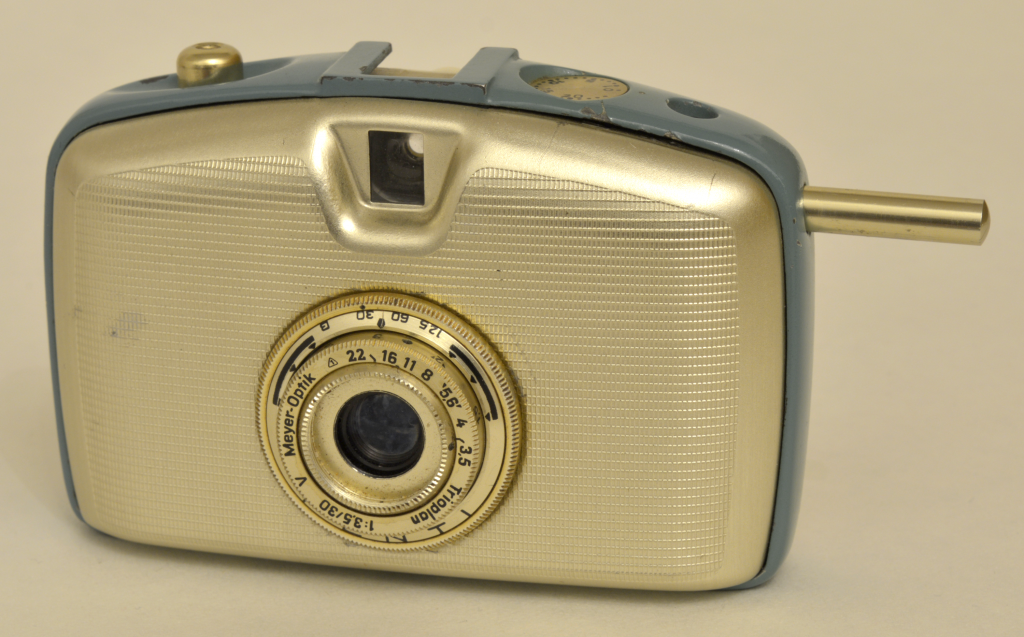
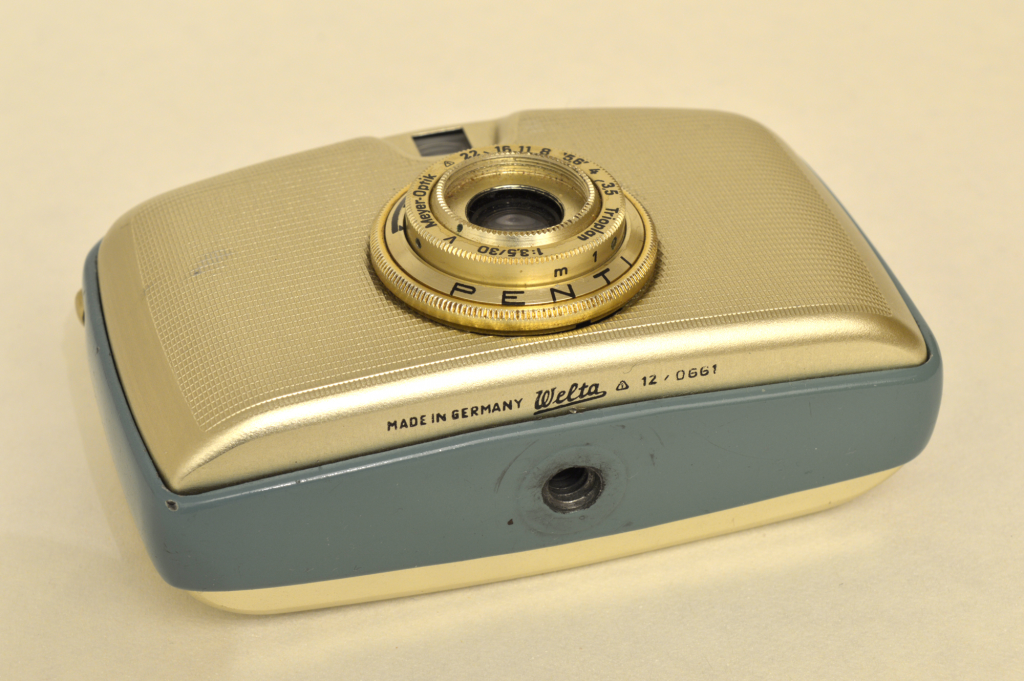
The Penti camera was produced by Welta in 1959, and is a real period curiosity, especially as it was only made for barely a year. The camera I have is one of only a handful that I’ve bought off Ebay (I prefer the thrill of the hunt at camera fairs) – it seemed to be the only way I would get hold of one as they are very rarely seen at fairs in the UK (possibly because of being an ‘East German’ camera?).
McKeown’s states that the Penti was the successor to the ‘short lived’ Welta Orix of 1958 (I’d class both of them as short lived!). In preparation for this article I was determined to establish whether the ‘Orix’ really existed (there were no images online that I could find), and this hinted that maybe it was a pre production model, that never reached the dealers shelves, but I did eventually find a Welta website that has an image of one – the ONLY difference is the word ‘ORIX’ around the lens bezel (instead of PENTI) – not surprisingly the value guide is quite high – £300+. (about 6 times the Penti value)
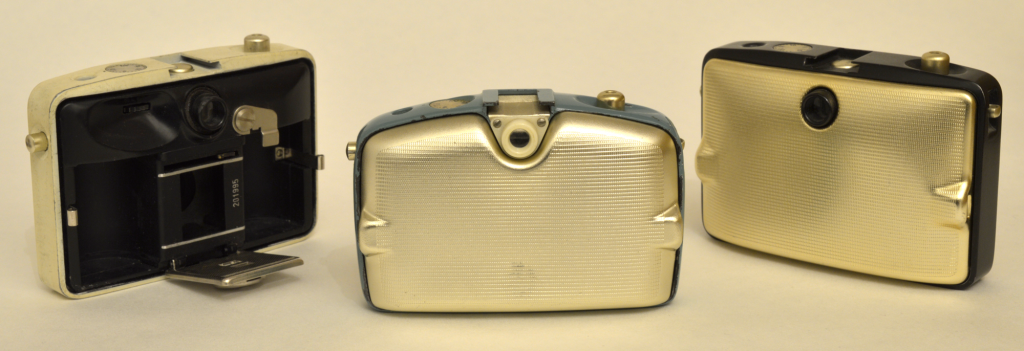
So, to the camera – and that tick list of features. It uses a push rod wind on/shutter cocking mechanism which is not at all common (although both the Voigtlander Vitessa and Whitaker Micro 16 spring to mind as sharing this design). The bar stays concealed until you press the top plate mounted shutter button, then ‘thwack’, it pops out from the top left hand side – you could in theory do a very rapid sequence if you wanted to. The bar is connected directly to a spring mounted bar along the top of the film guide, with a toothed tab to grab the film and push it along.
The film used is perforated 35mm, but it used the “it never quite caught on” SL cassette – this is a variation of the also not quite popular Agfa Rapid cassette – the preloaded drum is dropped in the left chamber, a take up drum in the right – and bob’s your uncle, you can fire away – well, for 24 shots, at least.
In theory this format was supposed to appeal to the home loading Eastern Bloc amateur – although the camera is clearly aimed at the female sex – and it’s true to say that amateur photographer males out-number females by a considerable number, so this was most certainly a bad move from the manufacturer in that very few ladies can be bothered faffing about in a makeshift darkroom…
The film is standard 35mm but the format is half frame! The Olympus Pen was yet to be launched so the ORIX/Penti cameras were ahead of the curve, in a way… but were always on to a loser with a film cassette that was limited to East Germany.
The camera is however truly unforgettable in the looks dept – the front casing and the fully removable back half are a textured/stamped/embossed bright gold metal – the camera body was available in several 1950’s ‘colours du jour’ – mine is aqua/green, but at least red and cream finishes were also produced. All remaining controls are gold finished and are very well plated. The overall appearance has none of the vulgarity of prestige marque limited editions.
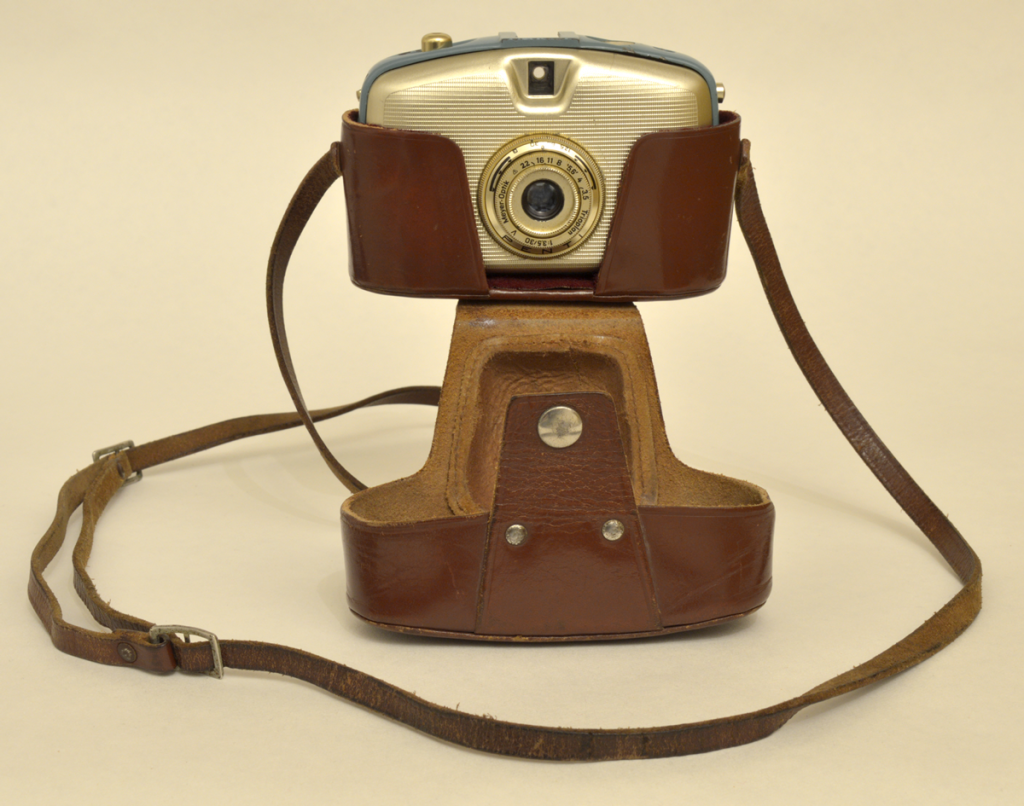
Mine has the very nice tan 2 piece ER case, but sadly NOT the charming lens hood…
The real shame about the Penti is that the lens (a focusing f3.5 30mm Meyer Trioplan) is very average indeed. The results from the Olympus Pen (and several other half frames) are sparkling in quality, but sadly that’s not the case here. If you add in the smeary low contrast film that would have been available at this period (ORWO, mostly), it’s something of a surprise to know that once Welta became part of VEB Pentacon the camera was relaunched in 1960 as the Penti II, with more rectangular design, built in light meter and brightline finder – and the same cruddy lens!
5 years after that it was relaunched again… as the Penti I, without the meter! I can imagine that was due to having loads of leftover bodies, so leaving out the meter is a good cost saving exercise… these 2 Pentacon versions also had a variety of colours, and body panels, and are much more common than the 1959 camera.
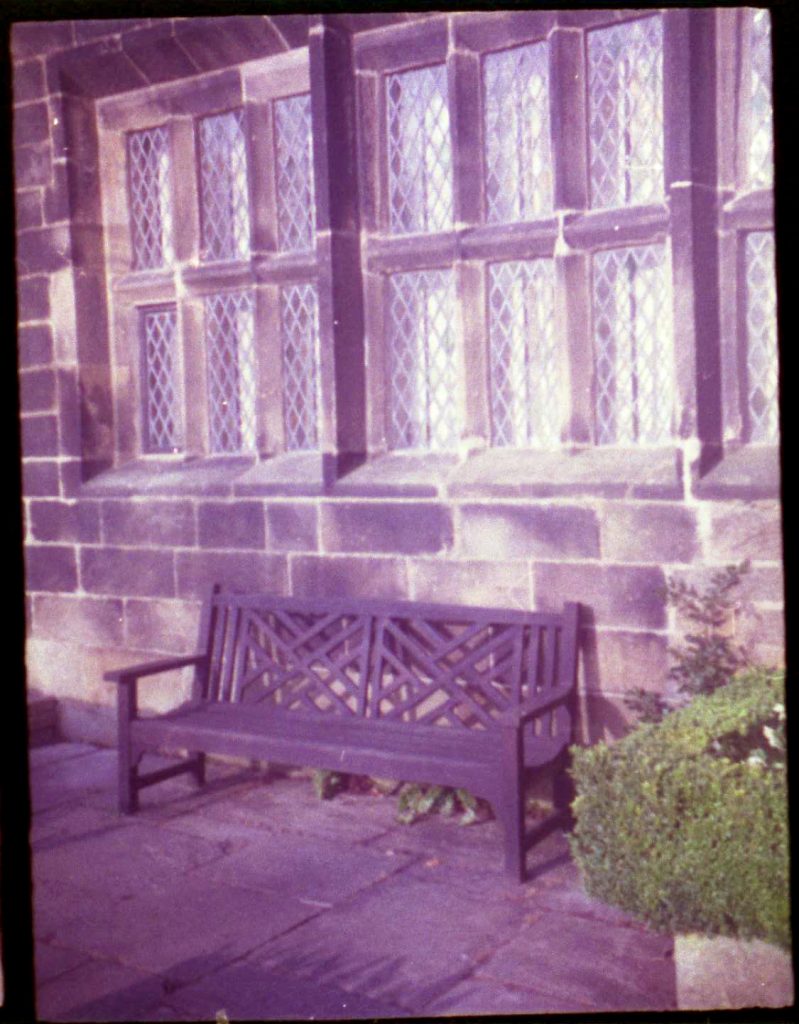
Given that this article is called ‘trying out a’ you may be wondering how I managed to shoot anything on an outmoded cassette system? I cheated – a recent club purchase of some Kodacolor gold (expiry: 1998) allowed me to tear off a useable length, hand push it into the cassette (luckily I have a few empties), shoot the film, put the exposed strip into a reloadable 35mm cassette, hand it in to the ONLY D&P shop left in Bradford and get it processed – sadly on that day their scanner wasn’t set up for half frame so I did have to do that myself.
I always enjoy shooting film with any of my cameras, and working manually is a nice exercise in concentration and technique, and a day out with the Penti was no exception. The 3 speed (1/30 – 1/125 + B) may seem limiting, but it’s more than adequate for it’s intended audience – and the cold shoe and flash nipple on the top deck add to it’s capabilities – now if only they’d made a gold flash reflector to go with it!
The Penti is a real looker – and that’s what I also got wandering around with it over my shoulder – funny looks, that is!
Trying out a… Fujica Half
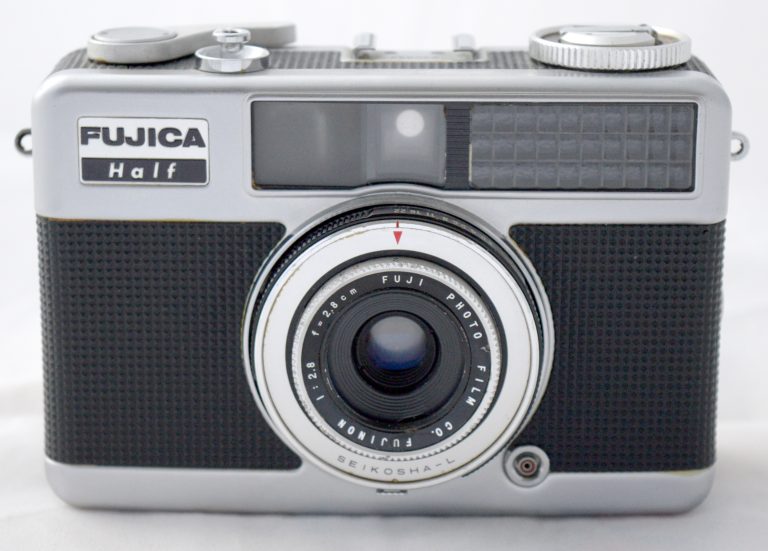
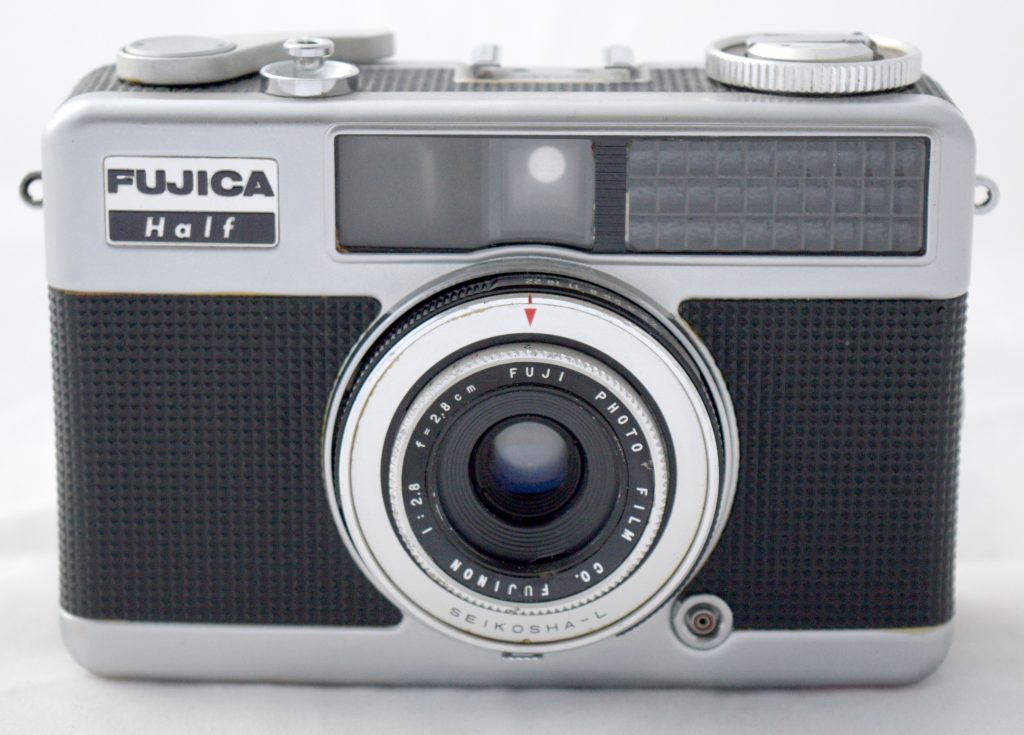
The Fujica half was the first of 3 related half frame cameras from the Japanese maker Fujica, with this model produced in 1963, the clockwork powered ‘Drive’ arriving in 1964 and the fast lensed ‘Half 1.9’ available in 1965.
Although Olympus didn’t invent the half frame format (24x18mm) with their 1959 masterpiece the ‘Pen’, there is no argument that they started a movement with that camera for a smaller, economical and, most importantly, high quality approach to appeal to the non professional photographer.
The majority of makers (especially the Japanese) produced cameras that were capable of producing decent shots, even when used by complete novices.
For the collector, half frame frame offers an amazingly varied and enjoyable seam of cameras to mine for, with models that for one reason or another failed to sell at the time, and variants that were not very well promoted, if at all. Well known examples being the Olympus Pen W or the Pen S black finish – these are almost as hard to find as the Leica 72! Any of these cameras fetch very good money, with the 2 Olympus examples being massively valuable compared to their early 60’s list price (The Leica was jolly expensive in 1960, and is jolly expensive now!).
And yet at an almost 70 year distance there are half frame cameras that are a joy to use that regularly sell for under £30 – mint! The Fujica half is a perfect example.
The specs certainly tick a healthy range of boxes – fully automatic exposure – full manual overide – built in self timer – good quality focussing lens – excellent build quality – truly pocketable.What’s not to like?
From my years attending camera fairs I’d say that in the UK at least the Drive is the more common of the 3 models, the 1.9 the scarcest, but for some odd reason the ‘Half’ trio are never over priced.
For my taste the Drive looks a bit of a mess design wise – the Canon Dial 35 has always been a personal (half frame) favourite, both from a visual and a user view, so the Fujica with its bodged onto the bottom plate winder never appealed at all. The Canon also has the winder on the bottom but it serves as a carry handle, so is truly integrated into the design. I’ve never been trying to collect every half frame camera ever made, and felt no urge to buy a Fujica camera whatever the condition.Truth be told the Half model only came my way as an unnoticed item in a box of mixed cameras won at a recent auction. However as soon as I had a proper play with it, I appreciated the sheer quality and design of the thing, even feeling slightly ashamed that I’d overlooked them for so long.
It’s easy to see how very quickly the SLR cameras of the early 60’s period became bloated and very ugly with each ‘development’ in automation. This was never the case with half frame – where the same manufacturer fitted in the same automation to their half frame siblings but with great finesse, rather than just sticking it on anywhere, with total disregard for style and profile. Maybe it’s something to do with appealing to the typical male requirement of size and vulgarity over style and portability! Many subminiatures and half frame cameras were marketed to appeal to a female audience – who had no interest in the ‘mine’s bigger than yours’ attitude.
I’ve commented before on the benefit of being able to shoot on modern emulsions with cameras of this period – and the Half is no exception – the lens quality on the Fujica Half is really wonderful, and is certainly at the standard of the Olympus Pen viewfinder models and the Canon Dial 35. It is a 28mm f2.8, which approximates a 42mm on full frame, so slightly wider than standard.
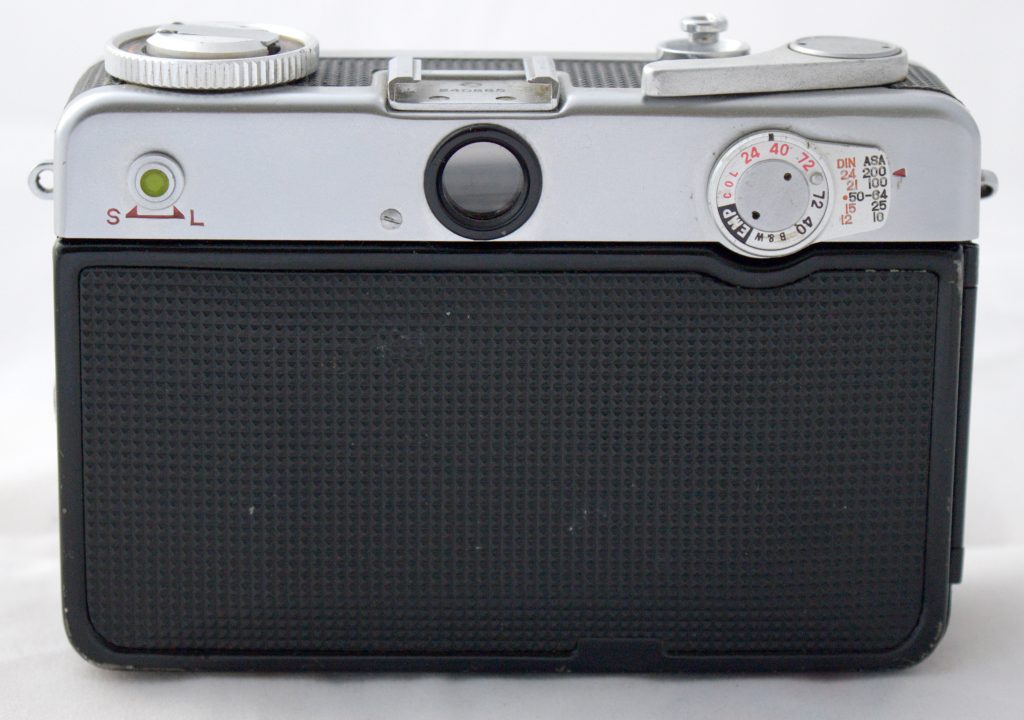
The layout does take a bit of getting used to – on my example the selenium cell is dead, so I had to shoot on manual, which in itself is no problem as I usually work that way, BUT the shutter speed is set on the underside of the lens – so although I remembered that one extreme was the auto setting, the next notch in was B, rather than the 1/30th, so I accidentally took a few frames of hand held long exposures by mistake! The focus is guestimate, but has the usual close/portrait/group/distant indents to help you set it without looking. The viewfinder has a left sidebar of apertures and shutter speed, but sadly this only works in auto, not as a visual prompt for working manually.
The wind on lever is very smooth and is only a short stroke as it’s only a half frame to move each time. The top plate has the self timer and is one of the real peculiarities of the camera. Every other manufacturer went for a simple trip lever, generally mounted on the front of the body. Fujica decided that it would make sense to fit a concentric clockwork around the rewind crank, and to make it quite difficult to wind, even if you have slender fingers! It takes 5 or 6 half turns of the very tightly sprung ring to prime it, then there’s a separate release button on the rear of the back plate to release it – bonkers over engineering!
The back plate also has the meter cell switch – a selectable arm offering 10 – 200ASA, and although easy to use, it slightly spoils the lines of the camera. The lens is helicoid focus, and the aperture control/Auto are concentric.
Of the 3 models I feel the Half is the nicest of them from a visual perspective, although I’d like to have a go with the f1.9 model just to test the lens. The quirks are minor, and are offset by the excellent quality of the results. Both close up and distant shots show great detail, and although not needed for every shot a lens hood would have helped with keeping flare to a minimum.
I’m sure you’re all aware of the insane rise in resale value of good, bad and indifferent film cameras recently – my advice is to get one of the Fujica Half cameras now while they are cheap – you can have fun shooting decent quality photos now, and IF the marketplace decides that they are to be the must-have camera you can laugh your head off when you sell it for a bundle.
Trying out a… Fujica Mini
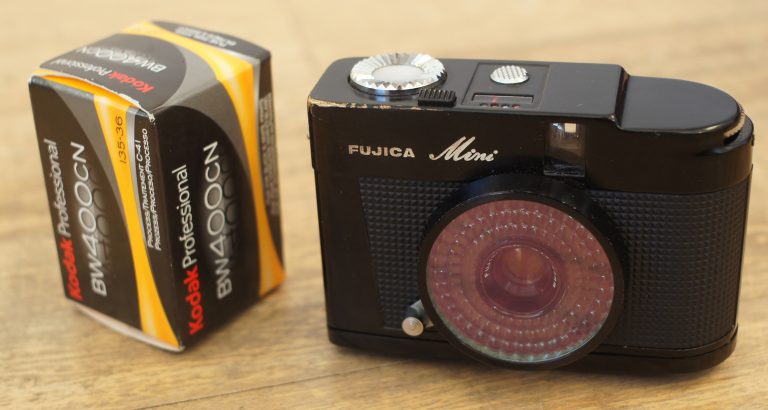
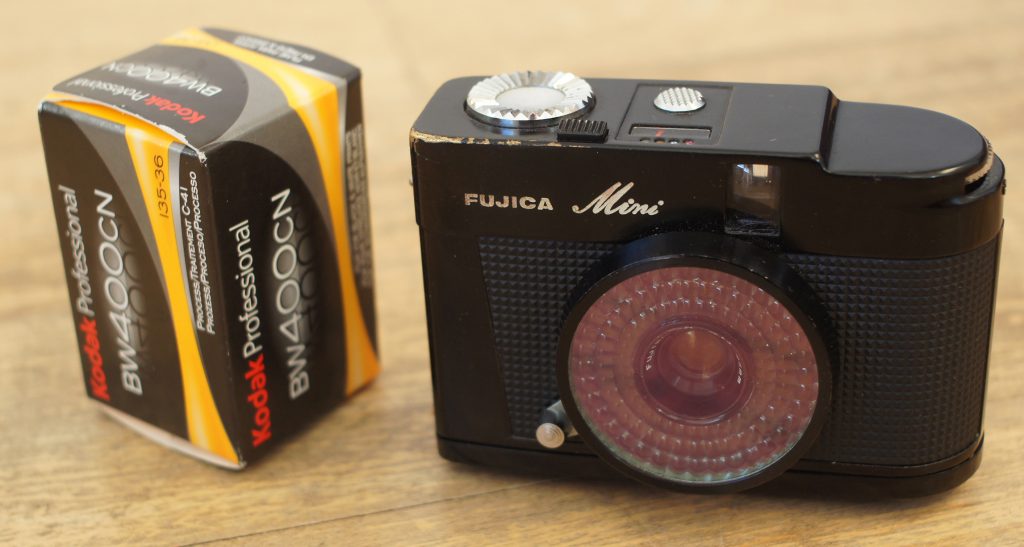
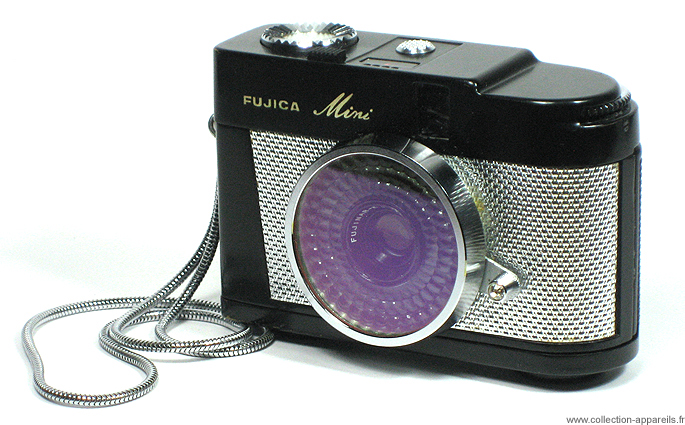
The Fujica Mini was produced in 1964 and was a direct response to the massive success of the Olympus pen EE camera. As with that camera, the Mini is a simple point-and-shoot model with quite a basic specification. It’s a fixed focus camera with a selenium cell mounted on the bezel around the lens and a simple match-needle exposure mechanism which closes down the aperture depending on the light conditions. This might sound little bit too simple, but the inherent built-in depth of field of any half frame camera makes this camera actually very versatile, while still being simple to operate.
It really is a diminutive camera and fits very easily into the palm of the hand. Its design was aimed squarely at female photographers.
The model I have is the most common – with an all black gloss finish with the words Fuji And mini engraved on the front plate and filled in white.There is a second model with exactly the same specifications, but which has a contrasting white satin finish to the raised grip area, and also a very large diamante embedded on the exposure control lever around the lens.
Loading the camera is a simple enough matter – the entire back is removed and the film the pressure plate (attached to the camera body, rather than the back plate) is hinged and needs to be folded down before inserting a standard 35mm cassette into the left-hand side, then pulling the film across and into the slots. The plate is then flipped back up and the back slotted on and locked via the base plate switch. Winding on the film and cocking of the shutter is performed with the large serrated button on the top plate of the camera situated on the right-hand side. With this being half frame camera the amount of film that needs to be moved is quite small, so this serrated thumbwheel does the job perfectly well.
The aforementioned pressure plate has a helpful film speed sticker placed on it with colour coordinated blobs; the films being ASA/DIN, rated at 25, 50, 100 and 200 ASA, red, blue, orange and green. You simply align the pointer on the top plate exposure meter with the colour coordinated diamante – I did say this was definitely aimed at the female photographer… I wasn’t joking.
Many half frame cameras count down so you put 36 exposure film in, set the counter to 72, and fire away. The Mini however counts up. The counter itself is located on the rear of the camera to the top right just below the film wind on – it’s a simple enough matter to move it along to 0 with your thumbnail – you’d have to be quite clumsy to accidentally wind it on during photographic assignments. The other controls are the wind on disengage button on the baseplate – film rewind is by a large inset serrated wheel to the top left of the camera and finally the rectangular top mounted shutter release. The viewfinder has a handy bright line frame finder. The Mini only has one strap lug – the camera was only ever issued with a snake chain, not a strap.
The designers really made use of the potential of half frame in that they kept the profile of the camera small, having the film chamber slightly protruding from the base plate of the camera. The right-hand side of the camera is squared off – the left-hand side follows the contours of the film cassette – altogether a very attractive camera in it’s black version, while not exactly manly… I’m not embarrassed using this camera but possibly the version with the white trim and the large diamante might get me some strange looks from passers-by.
All Olympus Pen cameras have extremely good quality optics, the Fujica lens is nice enough for its target audience, but I think not quite as good as the Pen or I should say not as good as the all manual Pen cameras.
The original Pen models from 1959 had a four blade aperture – the Mini only uses 2 blades which has an obvious effect on the out of focus areas in the images it produces, and can look intriguing & interesting but overall just not as classy or dazzling as shots taken with those Pen cameras. However this camera is very popular with the current band of (generally younger) photographers who enjoy using a retro film camera with a certain lens quality, and while not in the deliberately bad quality of “LOMO” cameras such as the Zenith LCA, et cetera it has its followers.
There is another reason for the Mini’s current popularity – it is one of few half frame cameras that featured a 25mm lens (38mm is standard for half frame) – I believe the only other viewfinder half frame with a 25mm was the very rare Olympus pen W. The Pen W was only available for nine months to a year and not many of them were made.The Fujica mini is quite easily available via Ebay, but that lens size is probably the reason for them commanding really quite high prices. For scruffy models you can expect to pay £60 to £100 and nice clean example with the leatherette case and chain £150. The two tone version could be anything up to £250.
While not a common camera at UK fairs, they do turn up, but I’ve never seen the 2 tone version in the flesh.
The Mini is one of those cameras that encourages you to take it out with you wherever you go. It’s so small, so easy to use, can produce really quite reasonable quality results and it’s fun to use as well.
And after all that’s what it was made for.
However I doubt very much whether anybody ever managed to get the quality of a picture that’s shown in the instruction manual. There’s a charming seaside snap of some children, next to, intriguingly, a photograph of a boxing match. Whether one would actually take the Fujica Mini to the front ring of a boxing match, I doubt very much.
Whether you are able to take a photograph of a knockout punch is another perfect example of marketers balony – the camera doesn’t have any facility for taking flash, and that fixed shutter speed of 1/50th could barely freeze a tortoise in mid lettuce munch, never mind a Joe Frazier left hook!
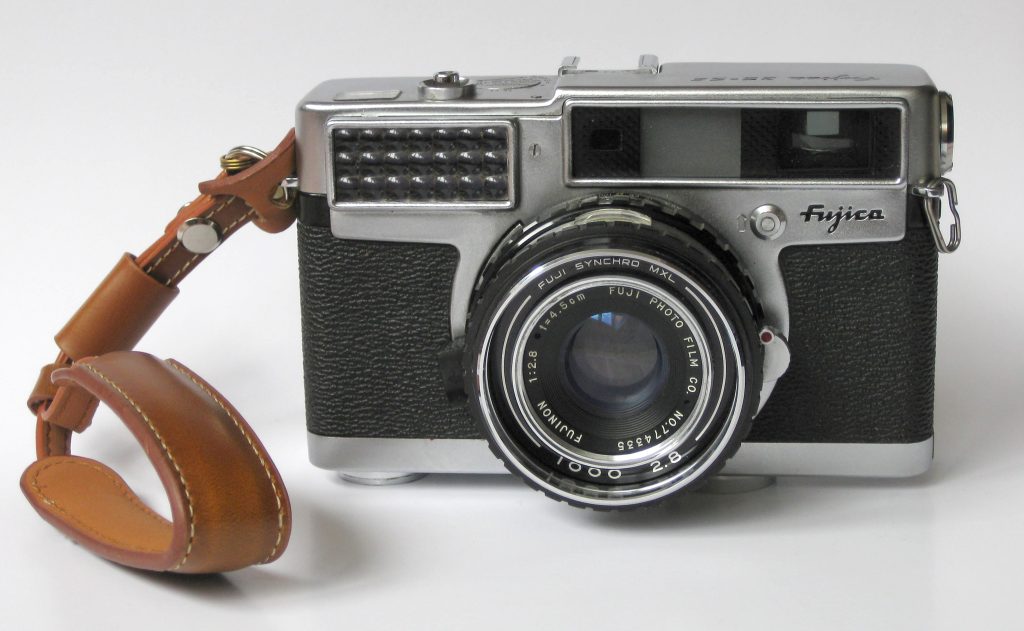
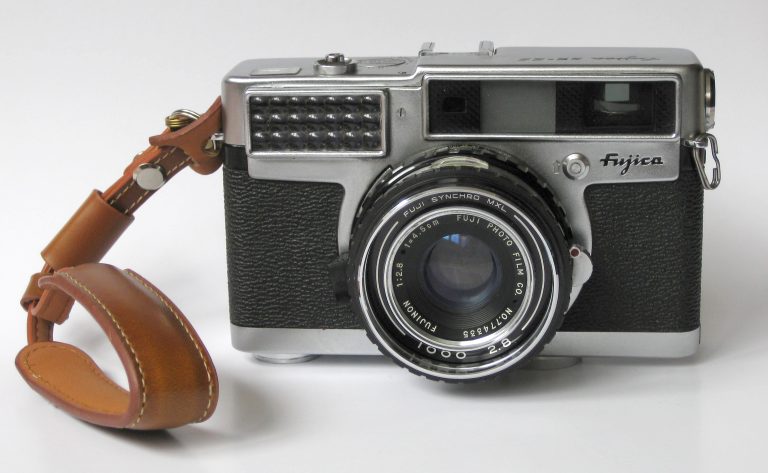
Trying out a …….Fujica 35-SE by Retro User
Under discussion this time is a fixed lens rangefinder from one of the neglected Japanese manufacturers of the second golden period of camera production. It’s all personal taste of course, but arguably the first golden period would be the 1930s, with the introduction of the Leica and the almost bewildering range of models from Zeiss, with the second golden period being the late 1950s, which brought a sea change in design and function that incorporated the leaps in technology at a considerable rate of knots!
The maker we are focusing on here is Fujica. Along with ‘lesser’ brands such as Yashica, Konica and Petri, Fujica produced some really wonderful/quirky (you choose) cameras from the 50s and through the 60s, to suit a very wide range of user, with well made, weighty cameras that appealed to the he-man snapper, and also ones which were for the fairer sex (if I’m allowed to use that phrase) – the charming ‘blingy’ Fujica Mini is a perfect example, and is also reviewed on this page.
Fujica also hopped aboard the half frame wagon – their ‘Auto Half’ was given the trial treatment by Retro User.As with many of those lesser brands, getting definitive information about production dates, model variations and so on, is very hard – and as ever the internet is rife with mixed up, cut and pasted misinformation.
Not all models were even available in the UK, which adds to the confusion. Thankfully there is one site which is trustworthy and reliable – www.mikeeckman.com and his info matches up with the bits I’ve gleaned.
The Fuji Photo Film Co Ltd followed a similar production path as other Japanese makers, with a medium format rollfilm folder that sold reasonably well, eventually joining the 35mm party in 1957 with their ‘Fujica 35 M – ‘Fujica’ being from FUJI and Camera – and I assume M means manual. 1958 was the year of the 35 ML, which used the light value system for exposure, and 1959 saw the release of the Fujica 35 SE, which uses a selenium cell to determine exposure. These three cameras all have a similar appearance, but the 35 SE has a single combined window instead of the separate viewfinder and rangefinder window apertures.
The final model was the 35 EE which added a fully automatic mode into the mix.
It’s quite astonishing how advanced and ‘modern’ the camera looks – and is clearly taking a design hint from the Leica M, and given that the Fujica 35 uses a ‘why the hell not’ approach to rewind lever position and operation, you could say that Leica returned the design borrowing favour with their slanty rewind M4!
Here’s a short list of some of the design peculiarities of the 35 SE:
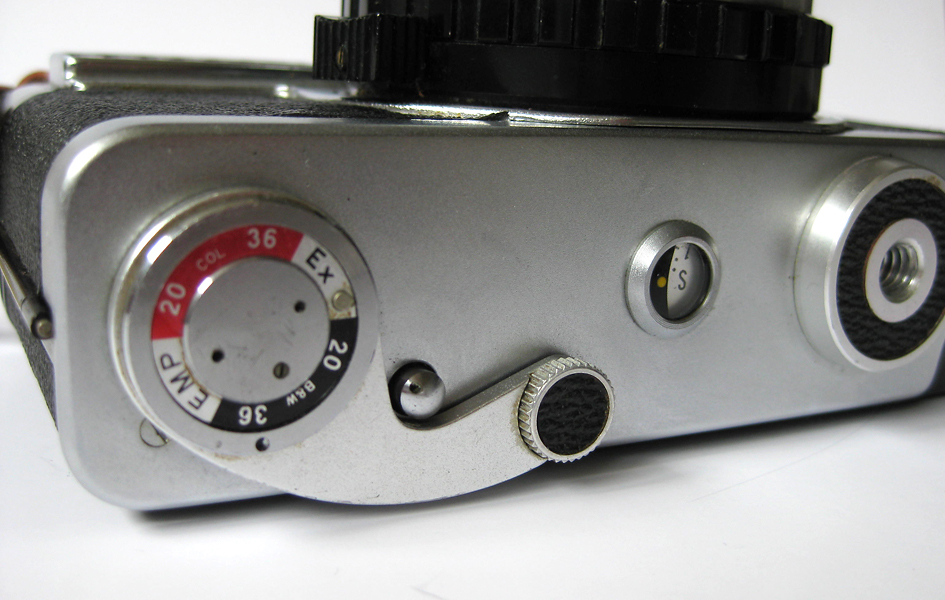
• Bottom plate mounted film wind lever
• Frame counter window on base plate
• Focus by thumb wheel, set into back plate
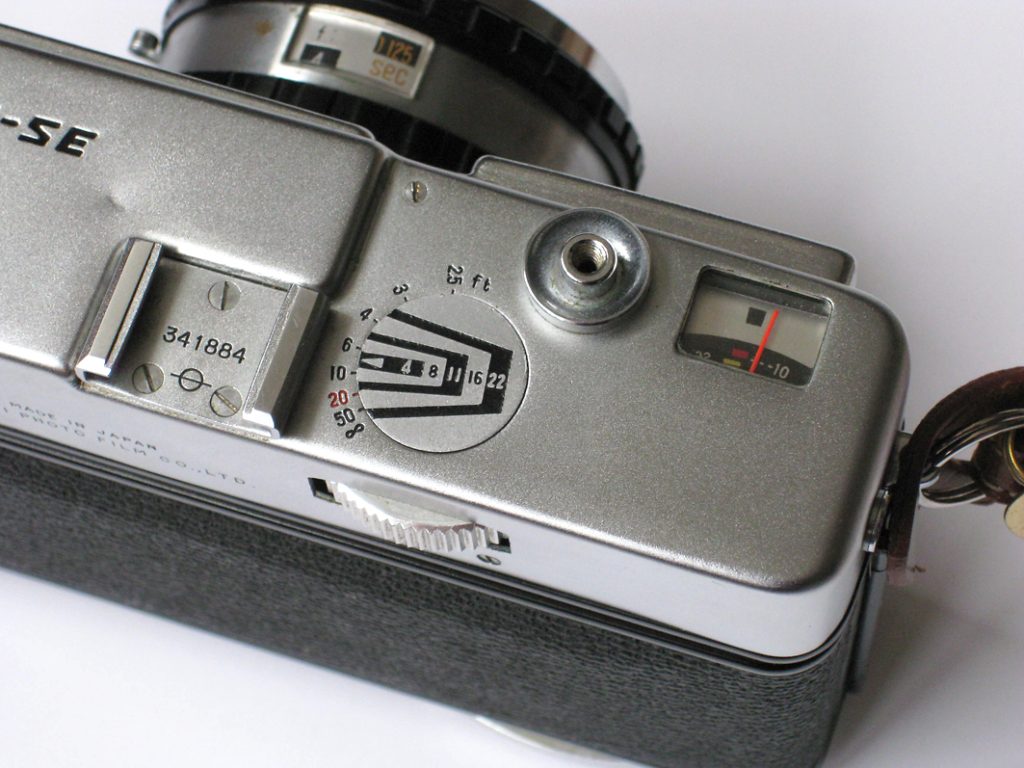
• Flush fitted moving depth of focus disc located on top plate
• Impossible to fathom exposure meter readout
• Interlocked shutter priority automatic exposure
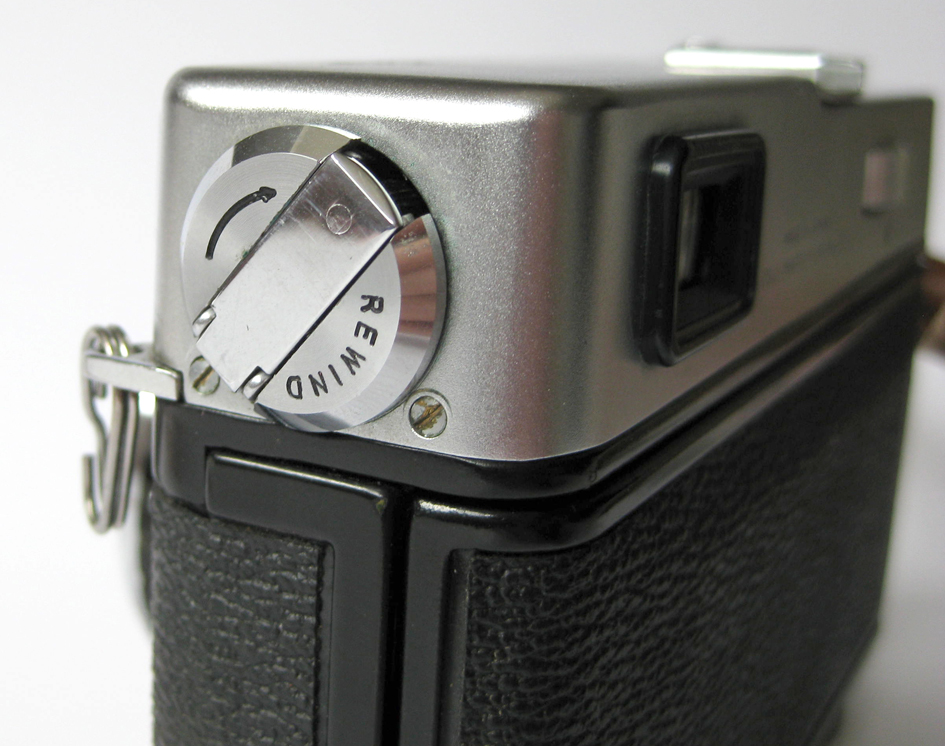
• Vertically operated rewind lever, located on side wall
The 35 SE is a heavy camera, but it is very well made, so that weight gives the user a feeling of solid reliability, rather than excess heft.
I noted that the user manual shows a tripod mounted wrist strap as an accessory – the camera does have eyelets left and right, but in fact I found that a modern wrist strap fitted to the right hand side gives a trusty grip and is great for keeping the camera ready for action when out and about.
The Fujica 35 cameras do turn up at fairs occasionally and as they all can be used manually it’s not a problem if the meter cell is dead, or, in my example, wildly inaccurate. It’s such a shame that the next techno breakthrough would be the battery dependent CDS cell – even if a battery hasn’t leaked disaster onto the circuits, often the thin wires are now so fragile and oxidised that the camera can’t be used. This isn’t the case here.
I wasn’t actively looking for one of these cameras, but I was fortunate to get mine recently at a fair on an ‘every camera a tenner’ stand. I was willing to overlook the ding on the top plate as the camera seemed to be firing OK, if a bit sluggish.
Doing filmless tests with tracing paper in the gate showed that the focus was accurate, and the shutter seemed to double with each step, so all that remained was to put a film through. The results (below) speak for themselves.
Shot on in date Kodak 200, the image quality is sublime. Wide open at f2.8 the out of focus areas are wonderful, stopped down the definition is excellent, and having a 1/1000th to 1 second (plus B) makes this such a good user camera. Having said that there is something of a learning curve to using it – to paraphrase Eric Morecambe – it has ‘all the right controls, just not necessarily in the right order’, but once you’ve got to used to it all (especially the wind on) it is worth the effort – the rangefinder works excellently, and that depth of field disc is a delight. The viewfinder may at first glance seem spartan – simply a brightline and nothing else – but when you adjust the focus the entire view shifts for parallax correction – now that’s class!
Why on earth they chose to add a complex, costly rewind mechanism is beyond me, but I’m glad they did. It’s almost mesmerising watching the rewind spindle turn one way, when the rewind crank is turning at 90 degrees to it! As you’d expect the back is hinged and is held in place with a sliding bar, rather than a more usual spring loaded lever, and a final note is the take up spool has plenty of slots, making loading (and getting the darned film to stay in place!) a simple matter.
My example has the 45mm f2.8, although there was a 45mmm f1.9 version (the instruction leaflet gives tables for both) – Ebay listings show plenty of examples of both in USA and Japan, but then you’ve got the customs duty, so best advice is to get a UK seller and for under £50 you should be able to get a good clean example – happy hunting!
